EnviroData’s File System#
EnviroData’s file system plays a key role in helping to organize and manage your environmental datasets. The file system provides a central repository for all files uploaded to EnviroData.
On this page, you will learn how to:
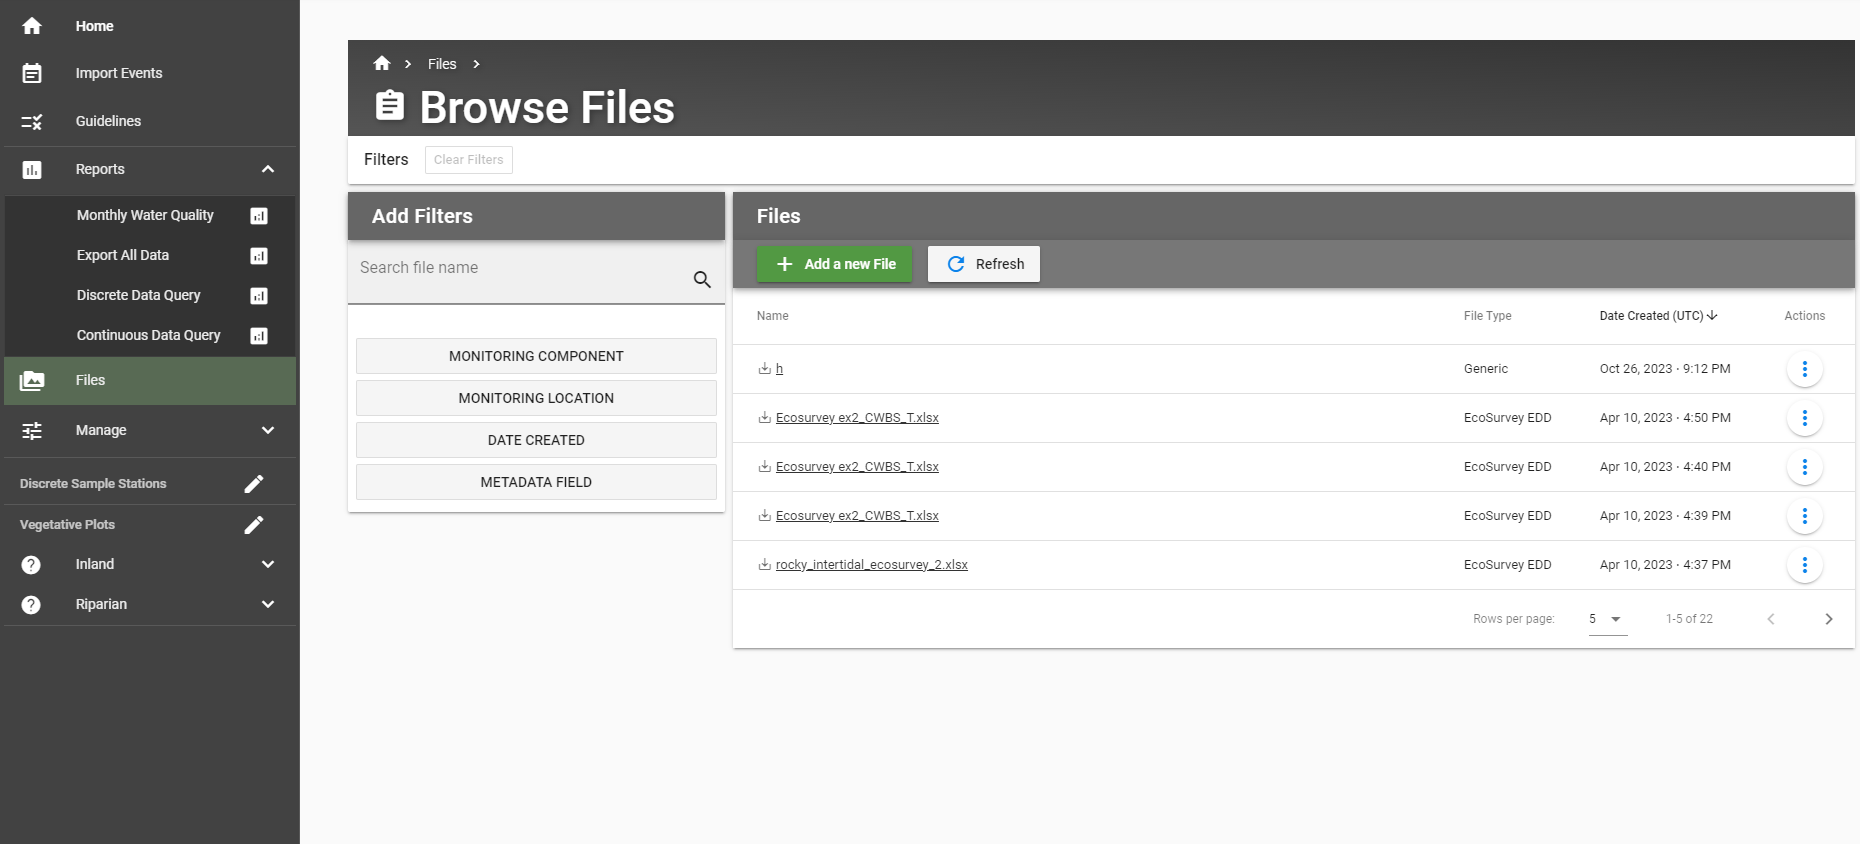
Browsing and Finding Files#
Navigating through the files already uploaded to EnviroData is a simple process. The user interface is designed to make it easy for you to find the files you need using various search and filter options. Follow the steps bellow to learn how to efficiently find the files you need in EnviroData.
Step 1: Navigate to Files Page#
Click on Files
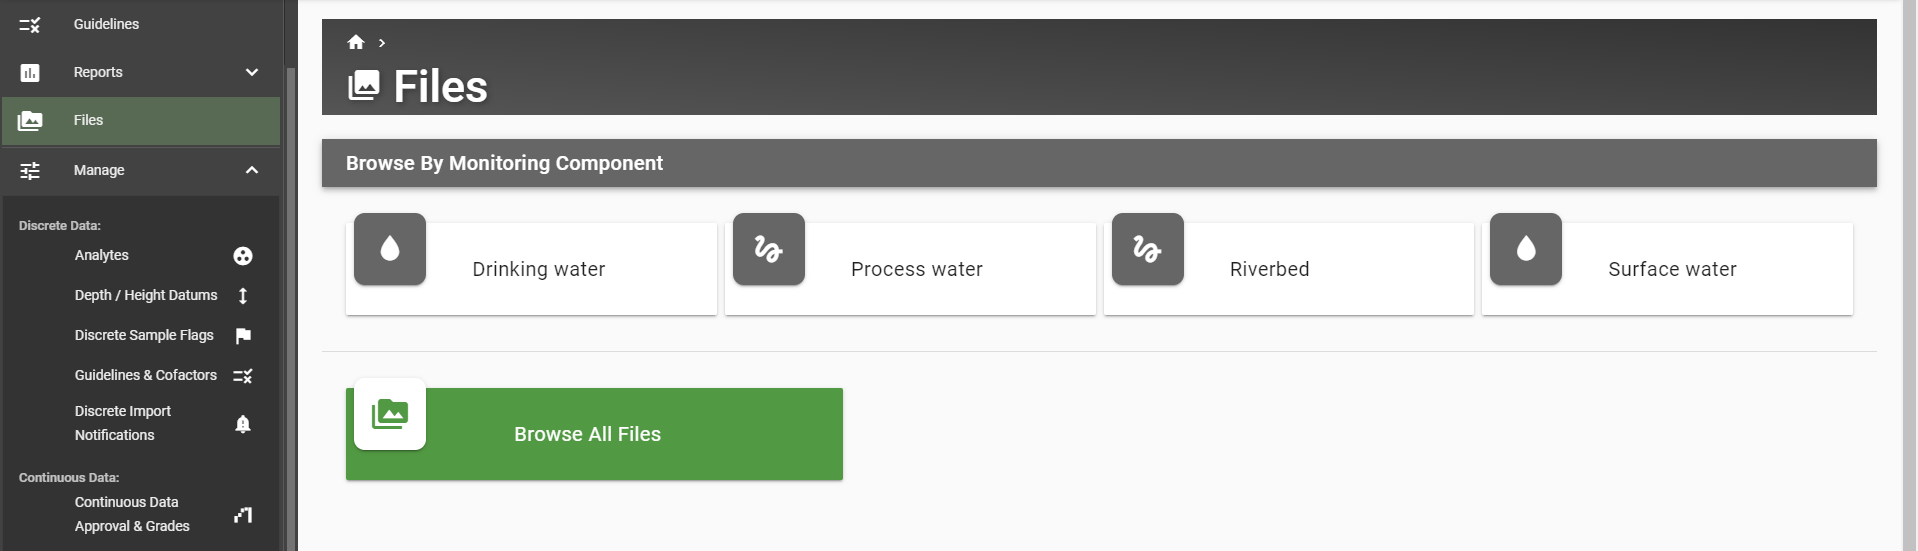
Step 2: Browse Files by Monitoring Component#
There are many ways to search and filter for files
To filter by monitoring component (Drinking water, Process water, Riverbed, or Surface water), simply click on the corresponding buttons
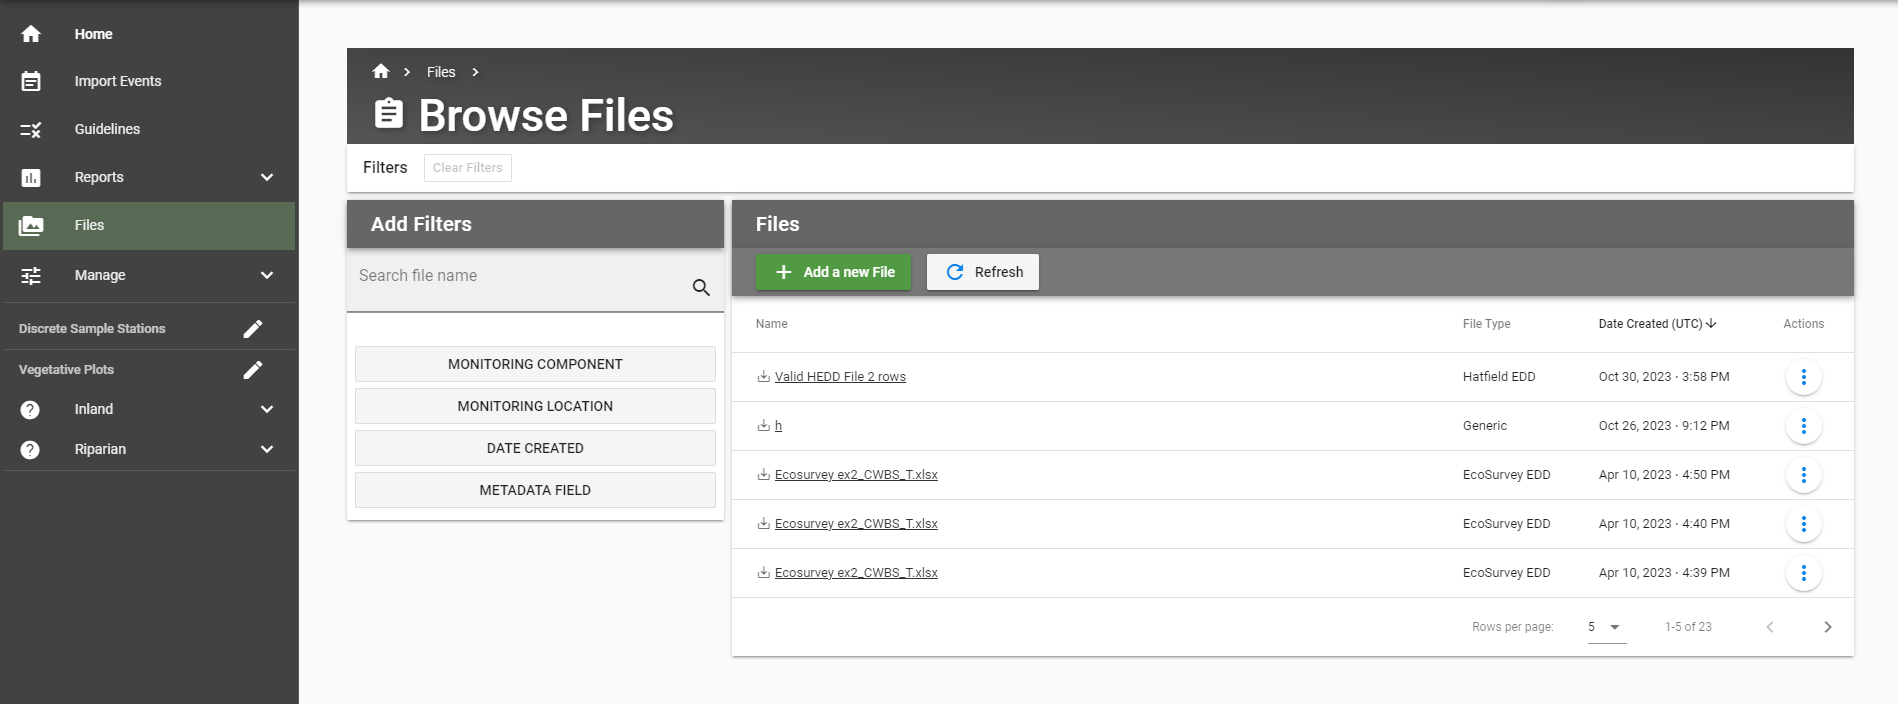
Step 3: Filter Files by Other Factors#
Click “Browse All Files”
Under “Add Filter” you can search for a file by entering its file name
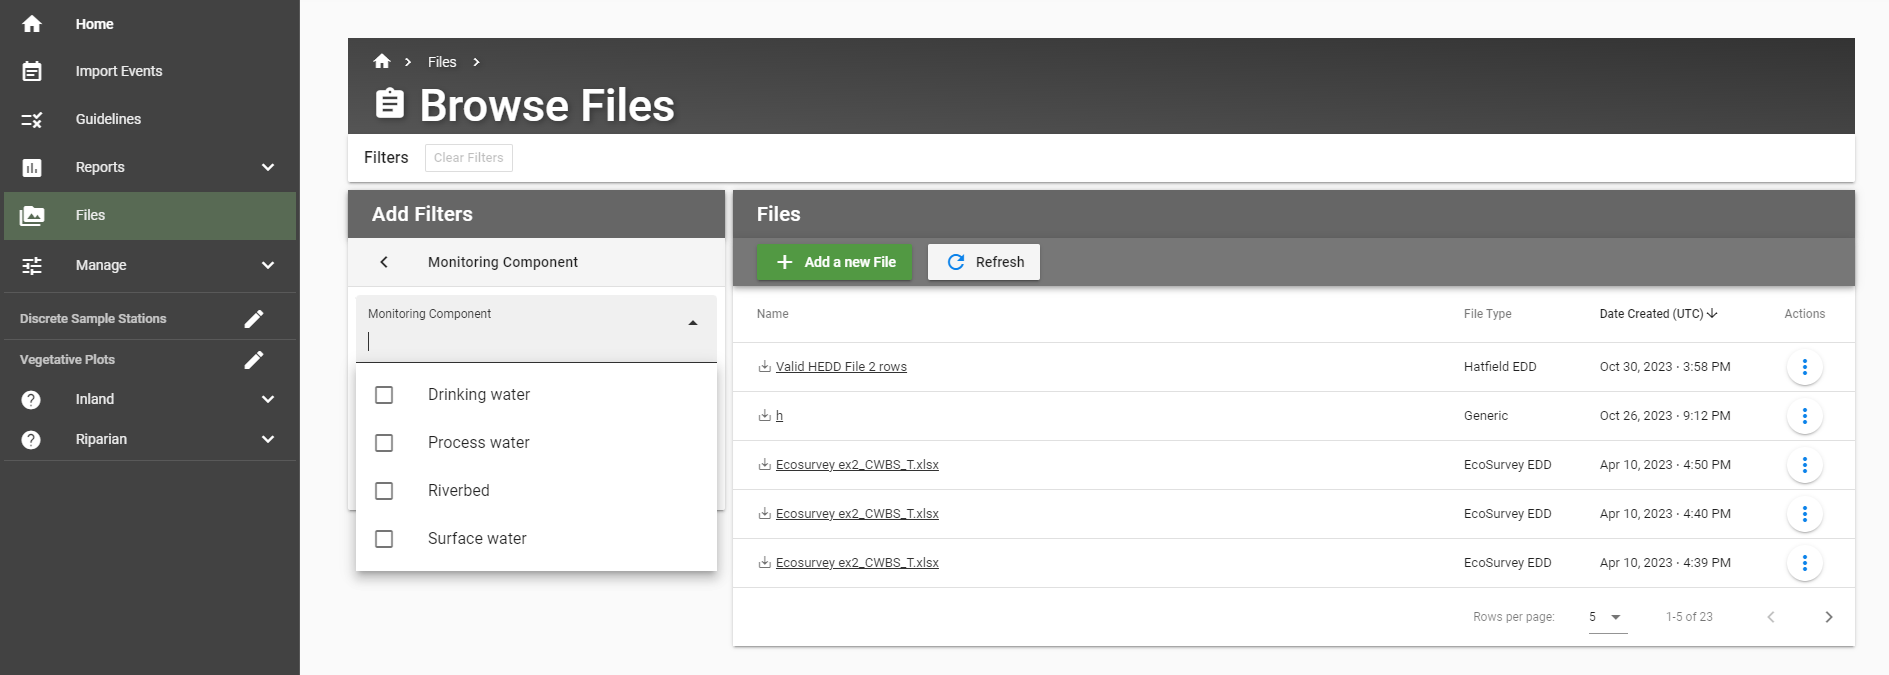
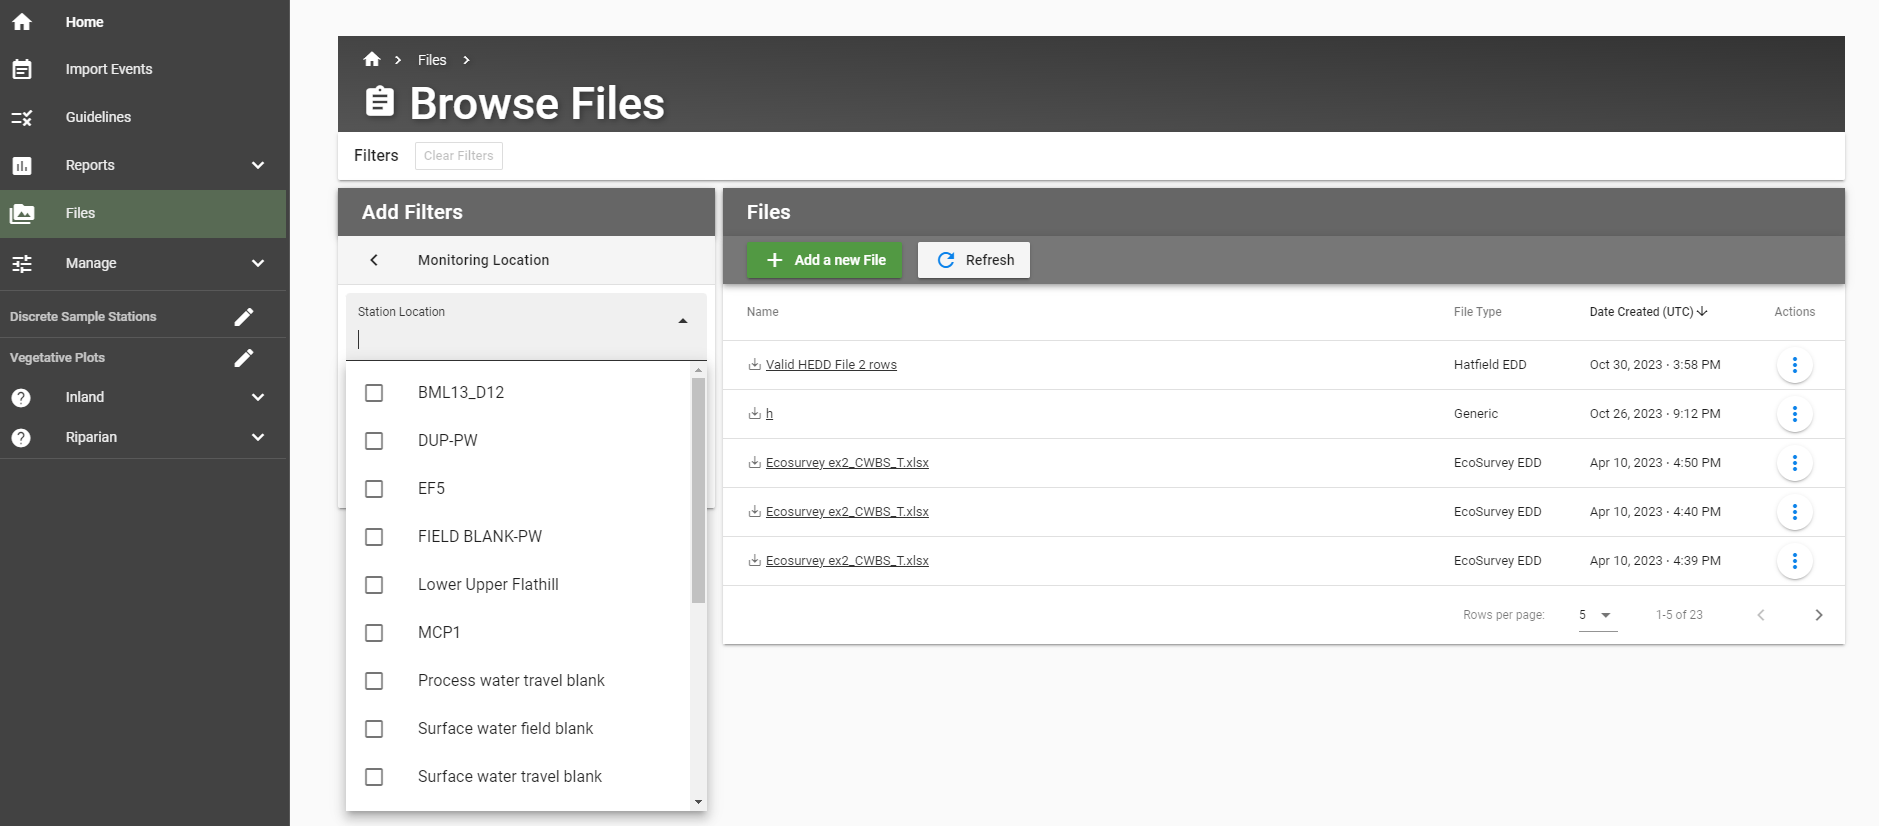
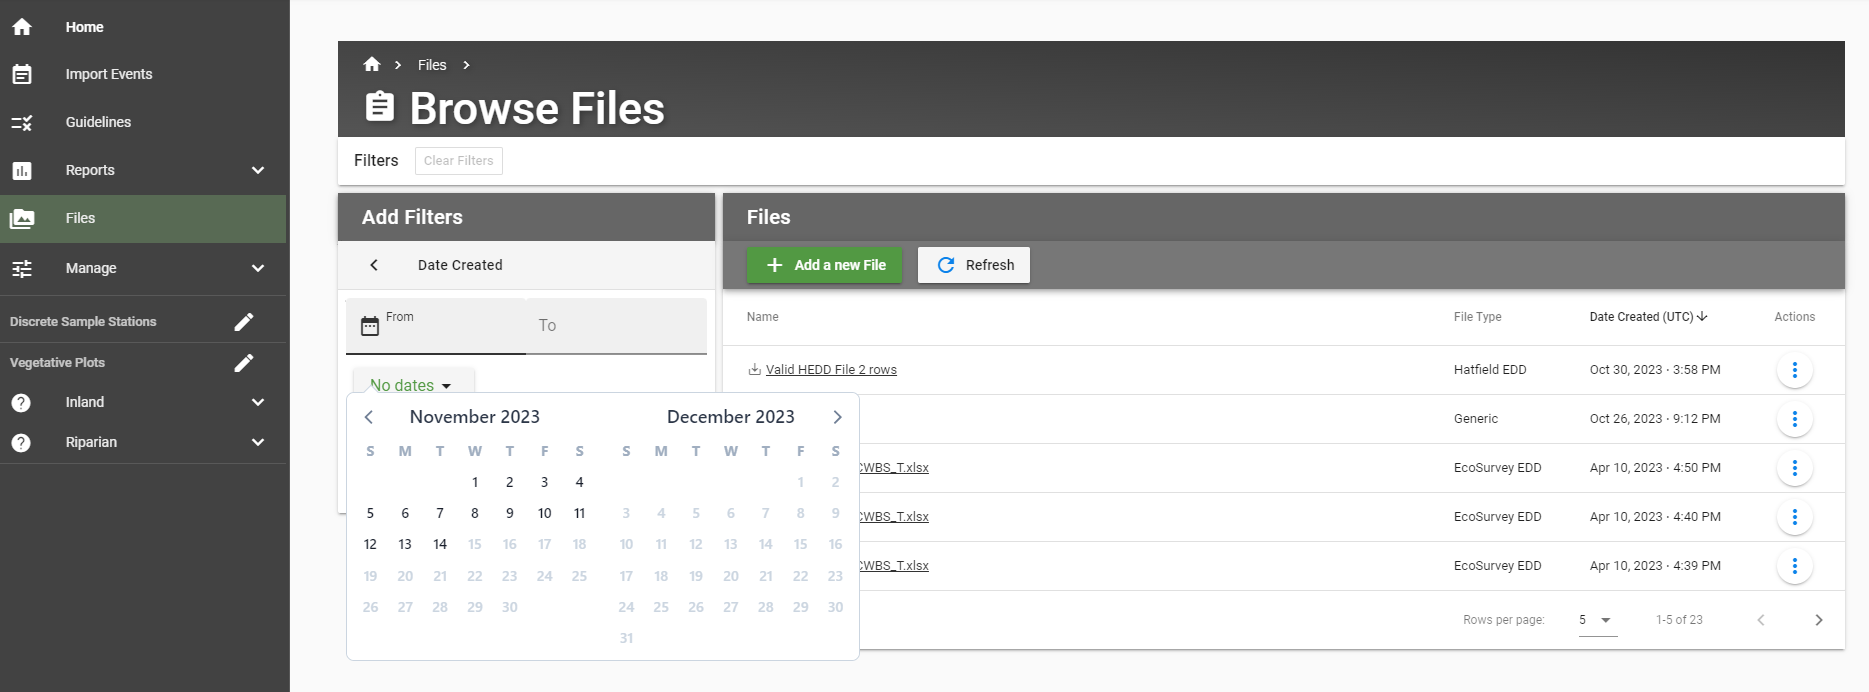
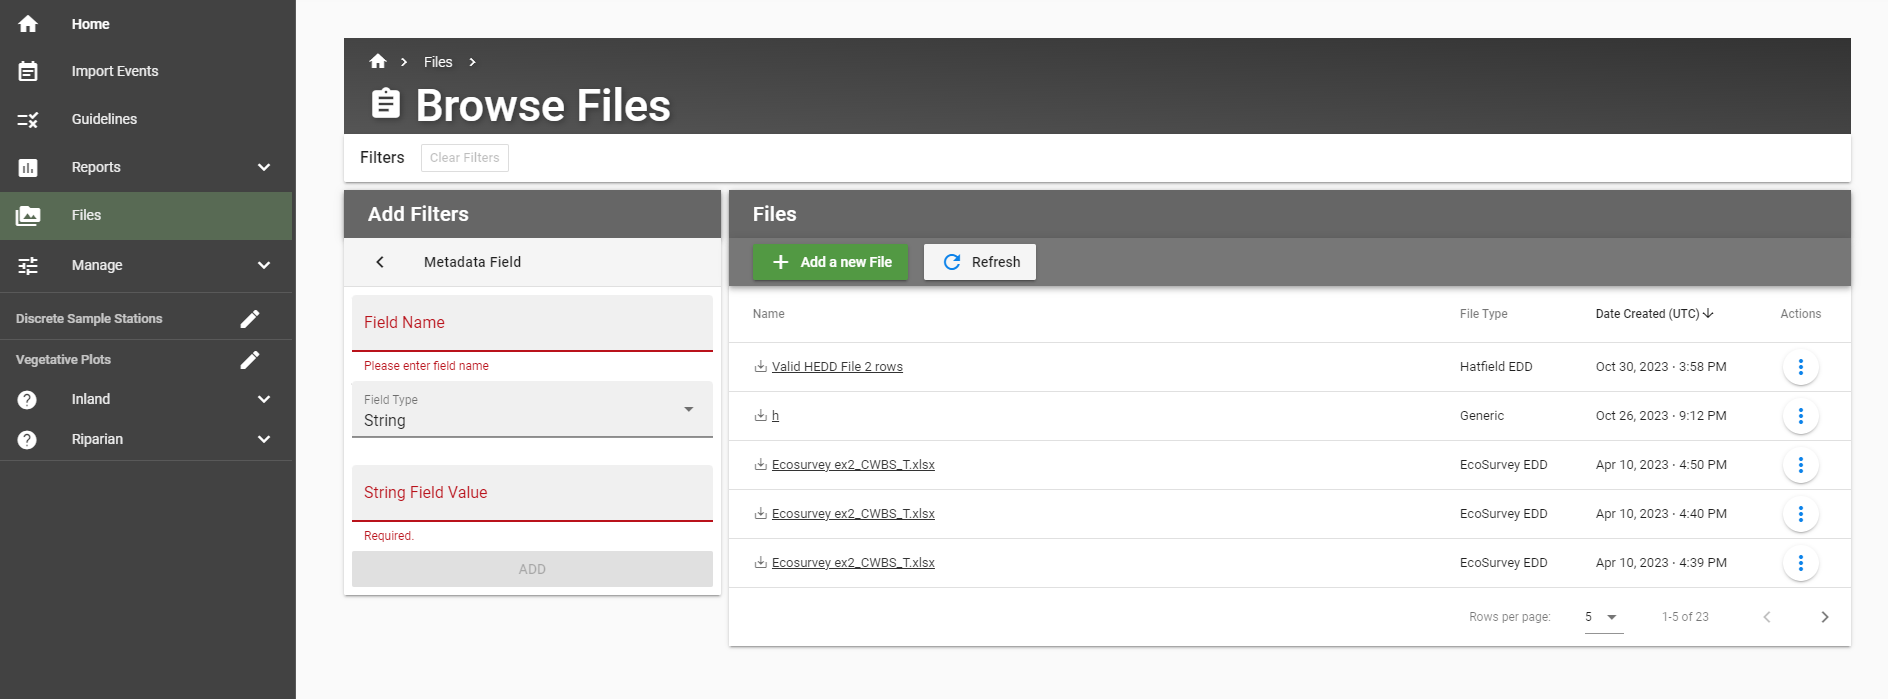
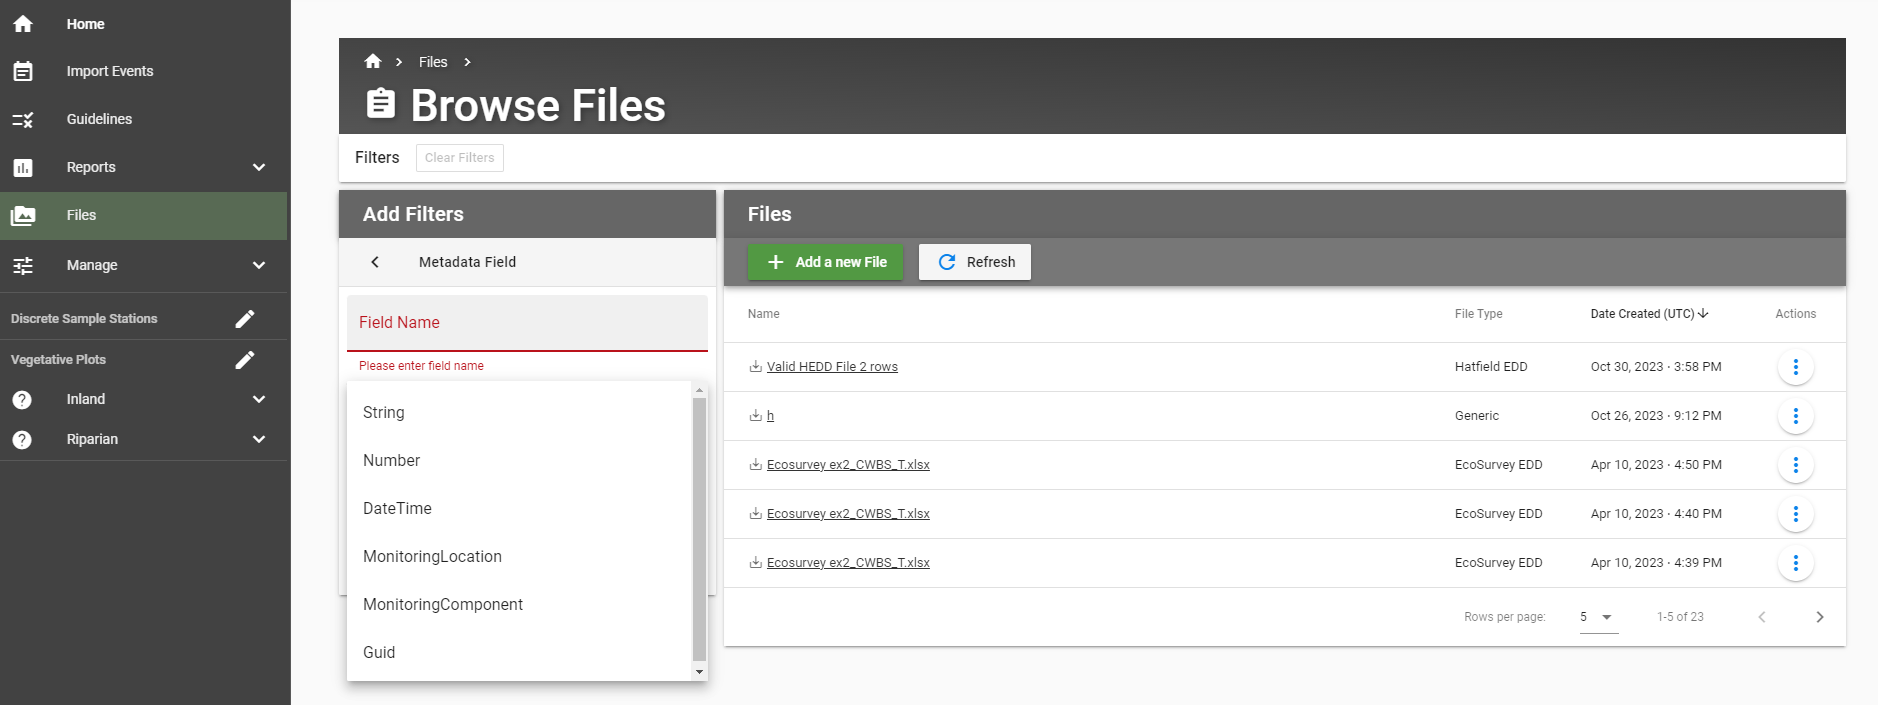
To filter for certain file(s), click on what you need to filter by (you can select as many as you want)
To clear filters, simply click on the small “Clear Filters” button next to “Filters” under the larger “Browse Files” header
Step 3.1 Monitoring Component#
These are the same that were shown on the main “Files” page
Step 3.2 Monitoring Location#
Step 3.3 Date Created#
Step 3.4 Meadata Field#
Uploading Files#
Uploading files to EnviroData is a user-friendly and straightforward process, streamlining the integration of your data into the system. This seamless procedure allows you to input a file name, choose the appropriate file type, and optionally include additional metadata to enhance the contextual information associated with your files. The following steps provide a comprehensive guide on how to effortlessly upload files to EnviroData, ensuring a smooth and efficient experience.
Step 1: Browse Files#
Click “Files” from the left sidebar
Click “Browse All Files” button from the main page
Step 2: Upload a new file#
Click “+ Add a new file” from the main page
Step 3: Add a files#
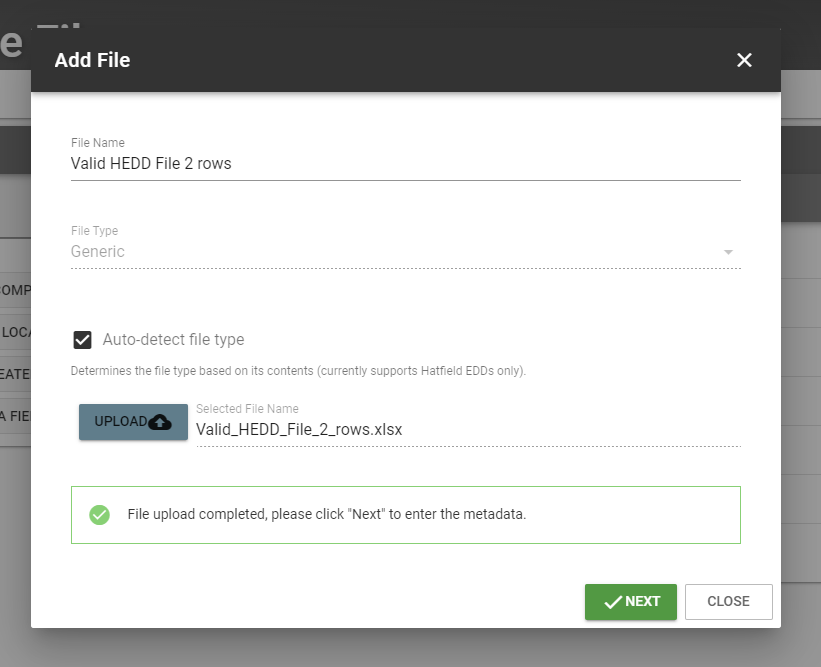
Enter a name of the file into “File Name”
Make sure to select “Auto-detect file type”
Click “Upload” to upload the file
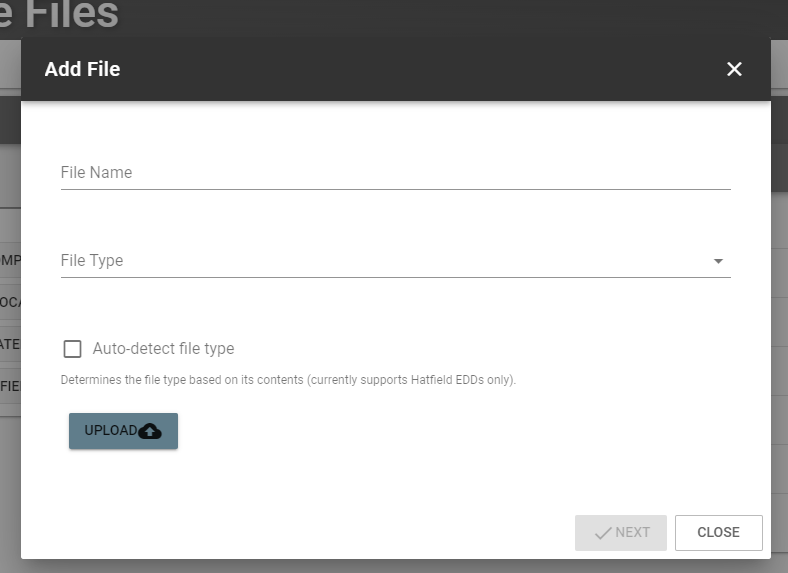
Click “Next”
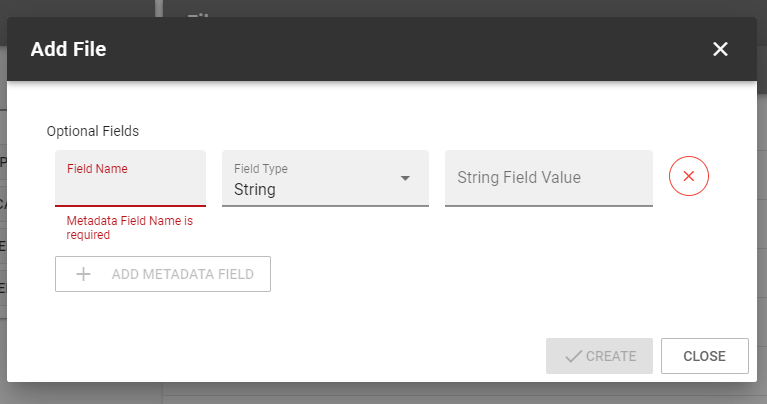
Step 4: Optional - Add Additional Metadata#
Click “+ ADD METADATA FIELD”
Fill in the “Field Name” and “String Field Value”
To add another metadata data entry, click “+ ADD METADATA FIELD” again until you have entered all the metadata needed
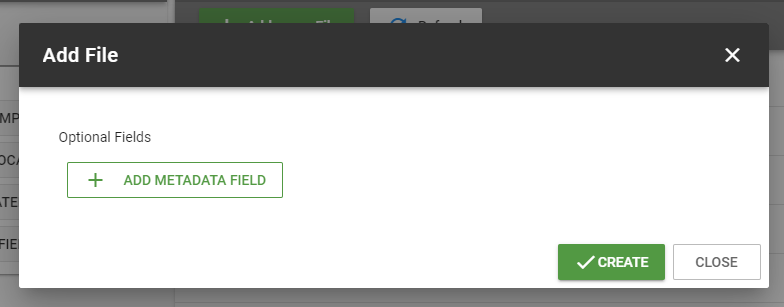
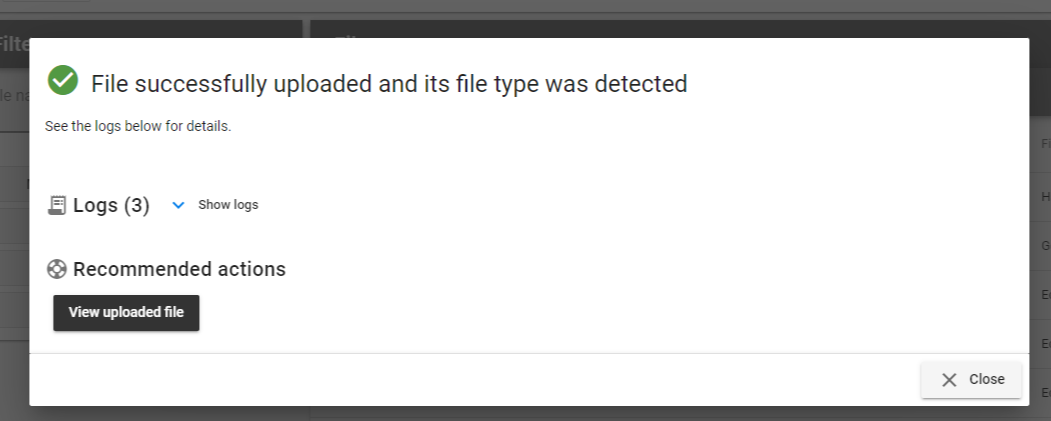
Step 5: Finish Uploading#
Click the green “Create” button
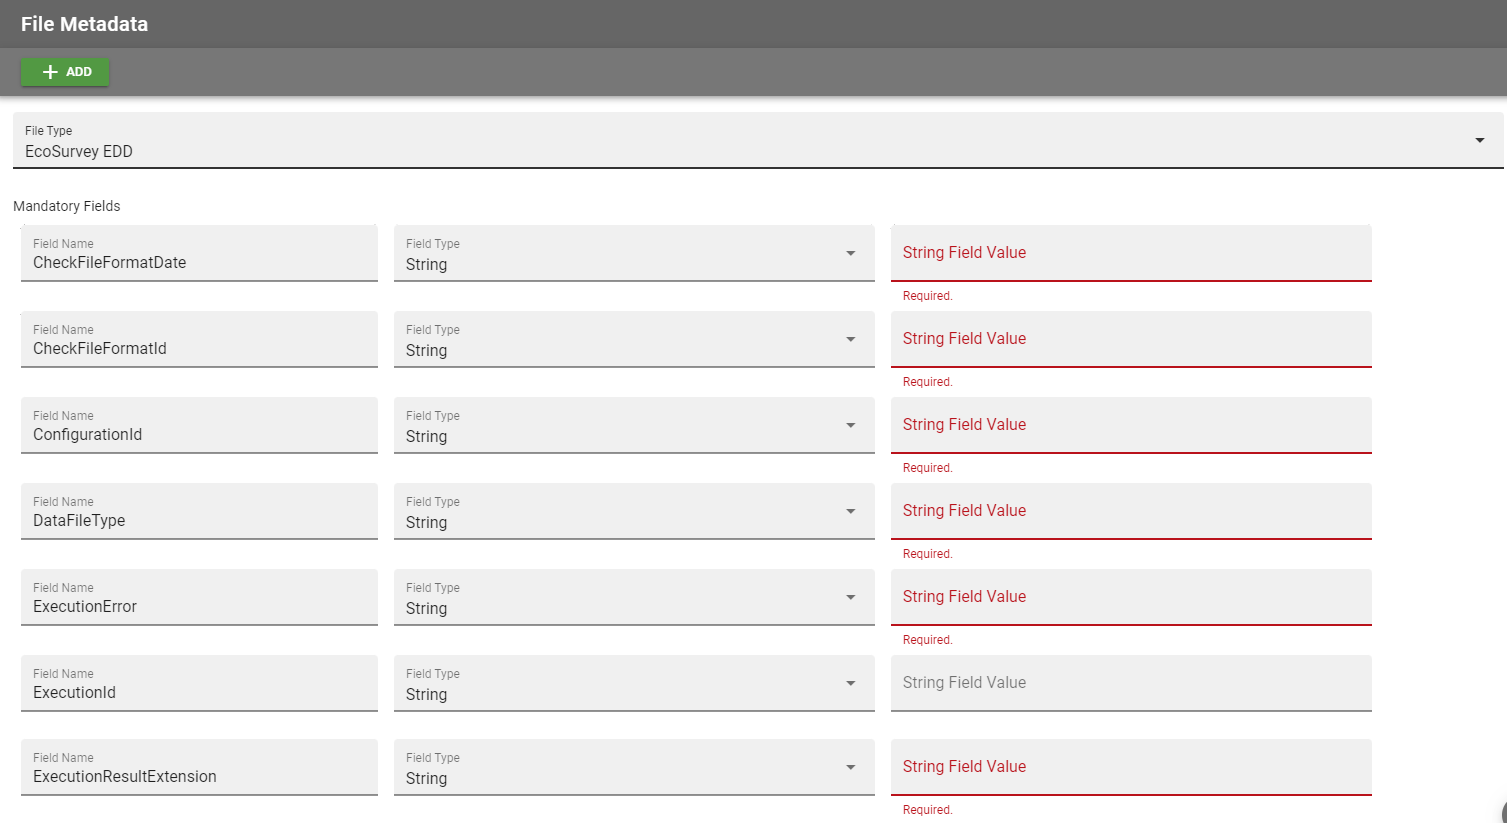
File Metadata#
Understanding File Schemas#
File schemas define the structure and format of data files. They specify required columns, data types, and other validation rules. When ingesting files into EnviroData, the file schema ensures consistent, high-quality data by validating against a predefined structure.
The schema acts like a blueprint - all files of a certain type must match the schema. Schemas allow flexibility through optional and dynamic columns, but also enforce discipline by requiring certain mandatory columns. Defining clear file schemas upfront and validating against them is crucial for maintaining data integrity and enabling effective analysis.
Assigning and Editing File Metadata#
You can assign or edit a file’s metadata using either the Browse Files system or through the Import Events page.
Using Browse Files#
Click on “Files” from the left sidebar
Click on the file you want to edit the metadata of
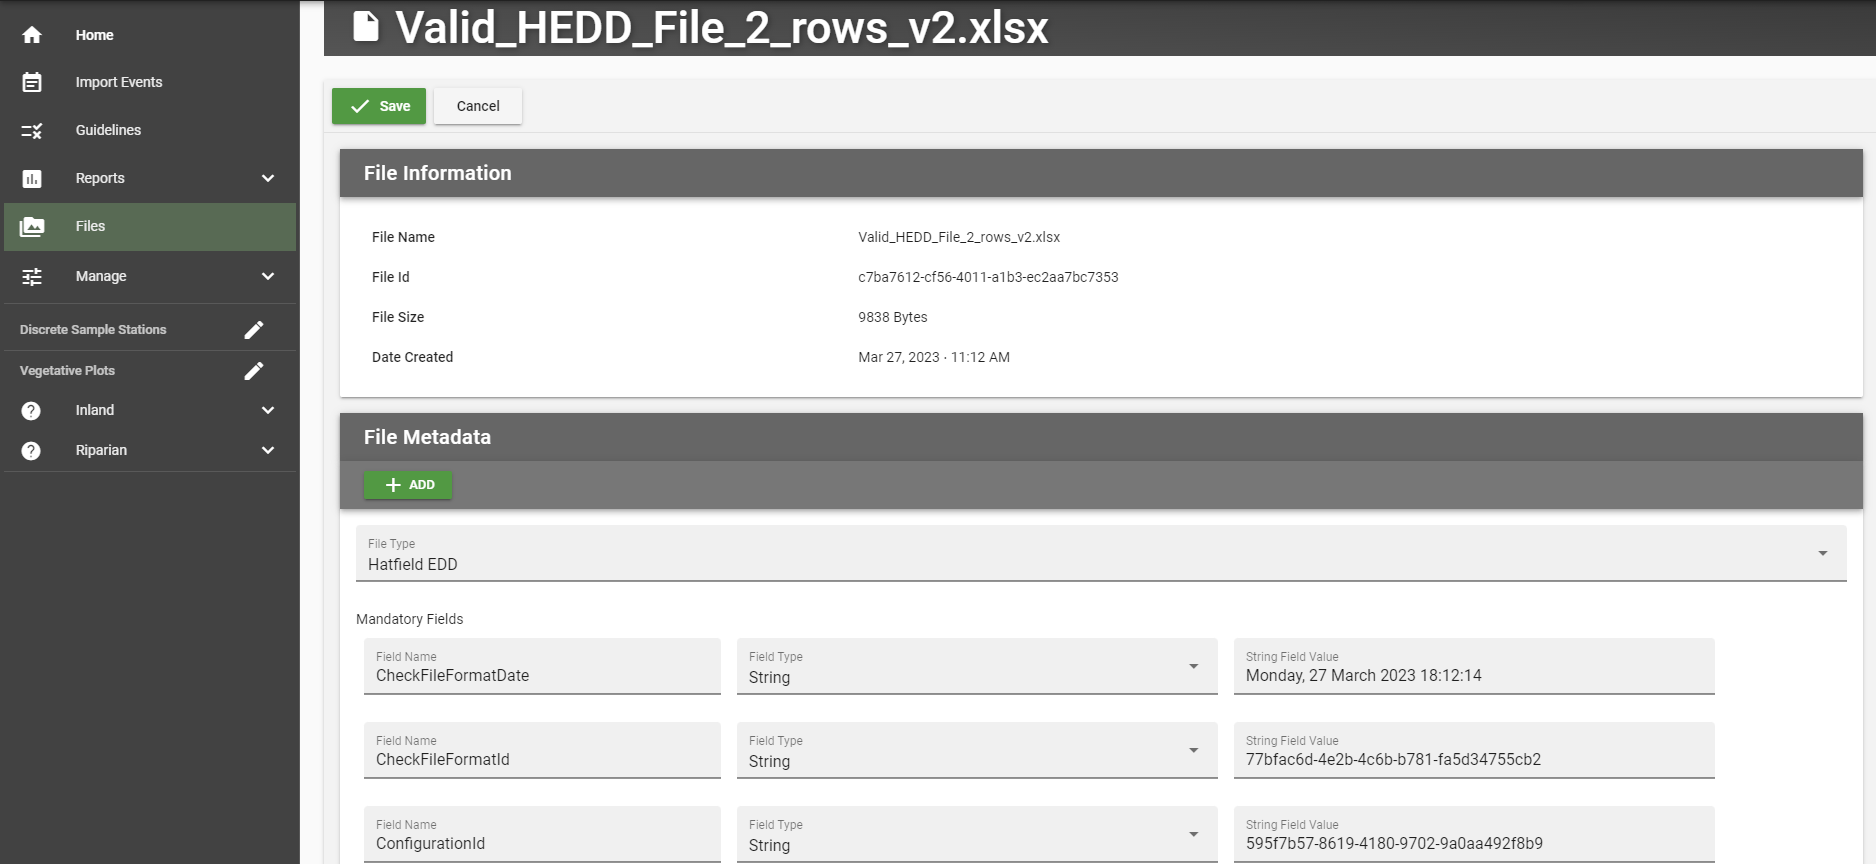
Click on “Edit metadata” at the top of the page
Edit the data by clicking “+ Add” and adding new data
Click “Save”
Using Import Events#
Navigate to the “Import Events” page from the sidebar on the left
Search for the file you want to modify using the search bar at the top right of the page or use the filer options on the left of the main page
Click on “Review File”
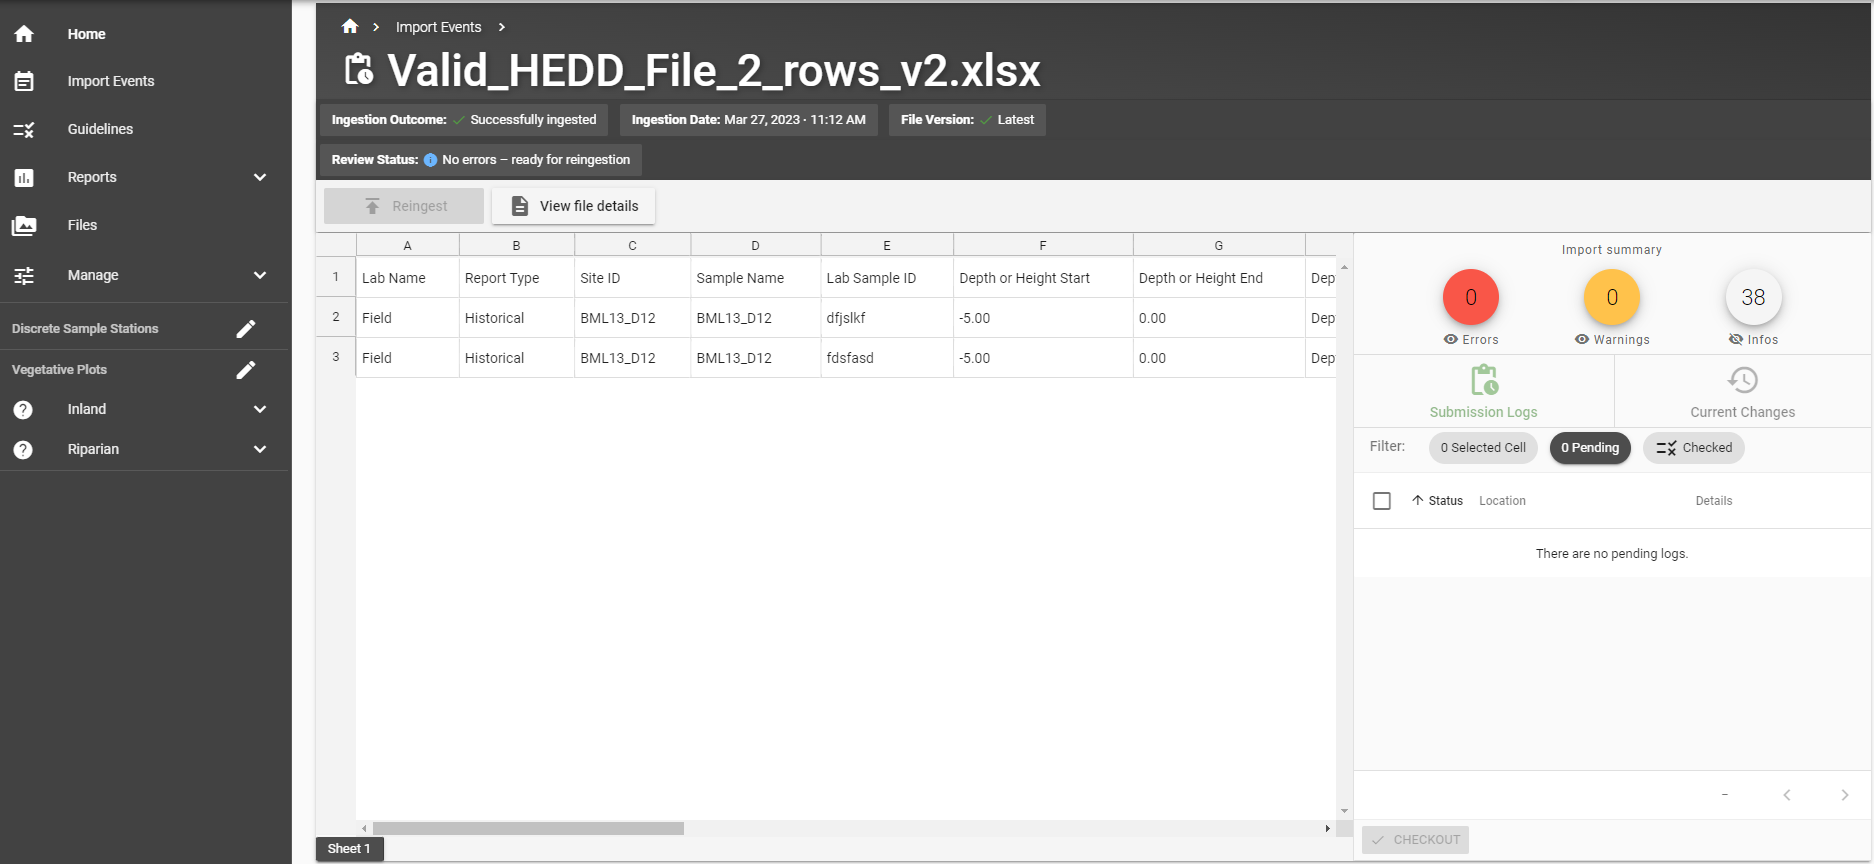
To edit the metadata, click on “View file details” at the top of the page
Click on “Edit metadata”
Edit the data by clicking “+ Add” and adding new data
Click “Save”
File Versioning#
File versioning refers to the management of multiple revisions of the same file. It allows tracking changes over time and reverting to previous versions if needed.
To view the version of certain files, there are two ways to view the file versions: if the file has been ingested, you can view the file version through the Import Events page or if the file hasn’t been ingested yet, you can view the file version through the Files page.
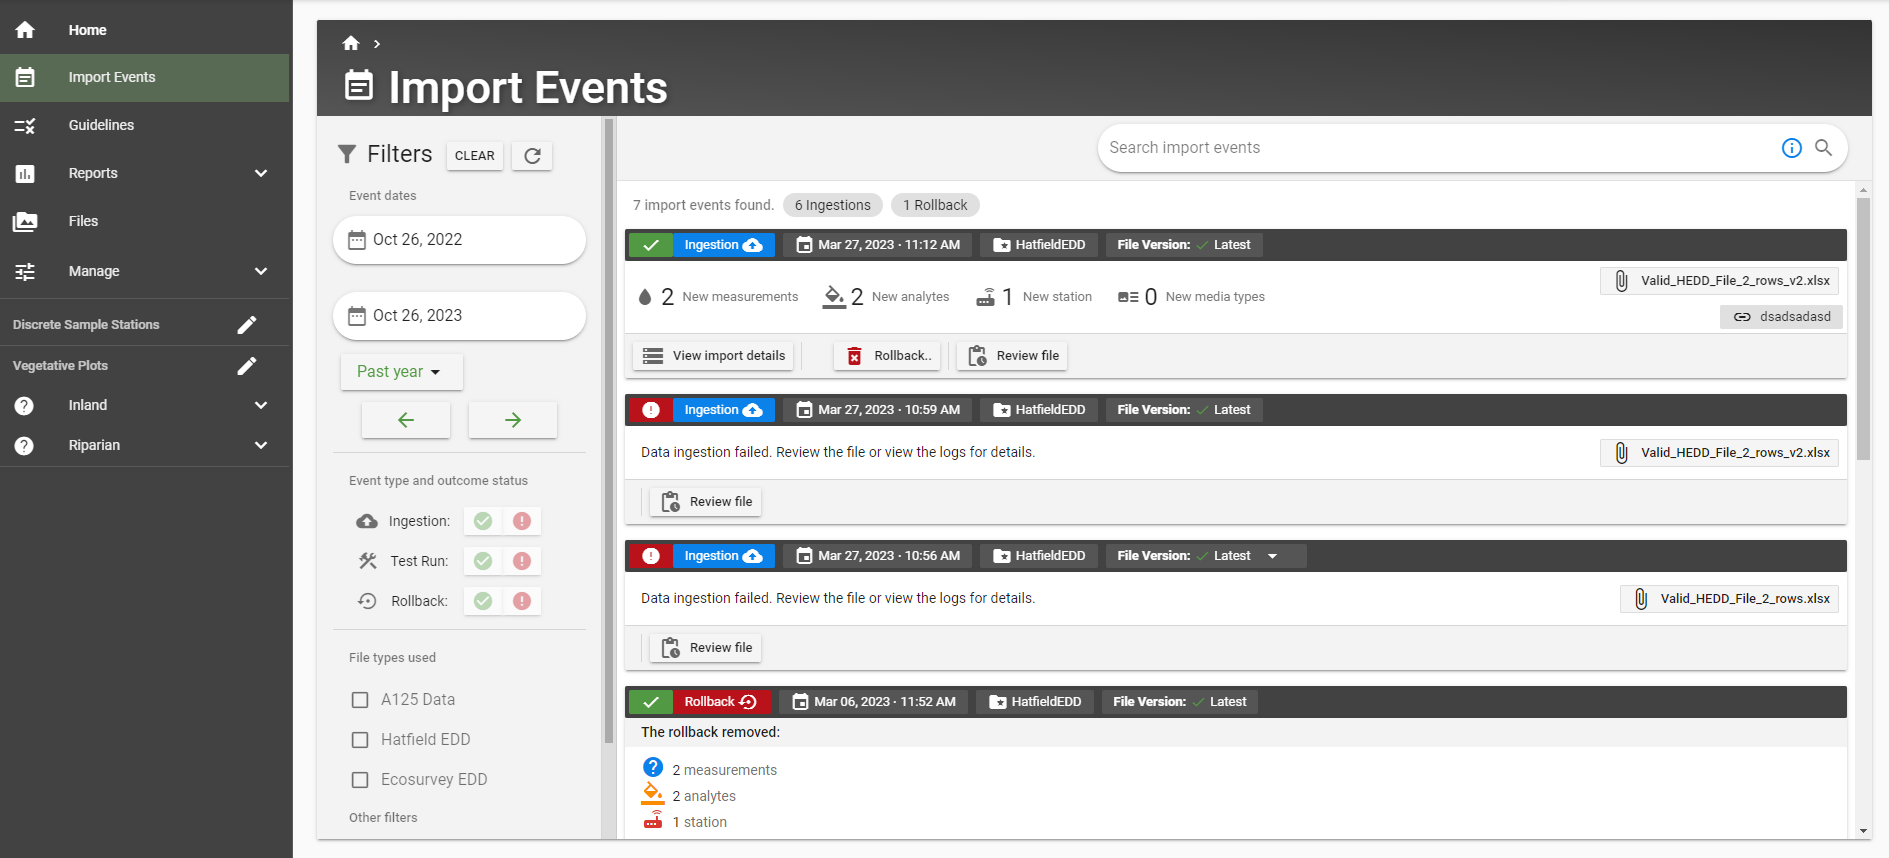
Using Import Events#
Navigate to the “Import Events” page from the sidebar on the left
Filter for the file you want to view the versions of using the search bar at the top right of the page or use the filer options on the left
The File Version is indicated on the top of each import event
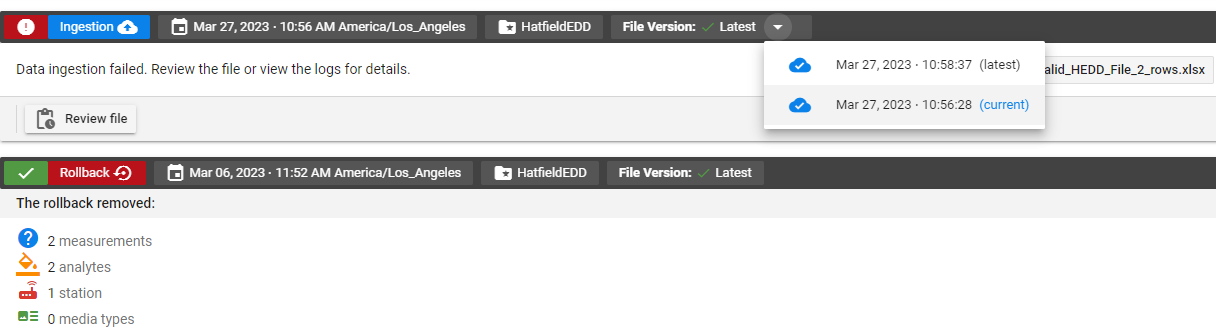
If there are multiple versions of a file, you can view the history of the file by clicking the dropdown menu under “File Versions” at the top of the page
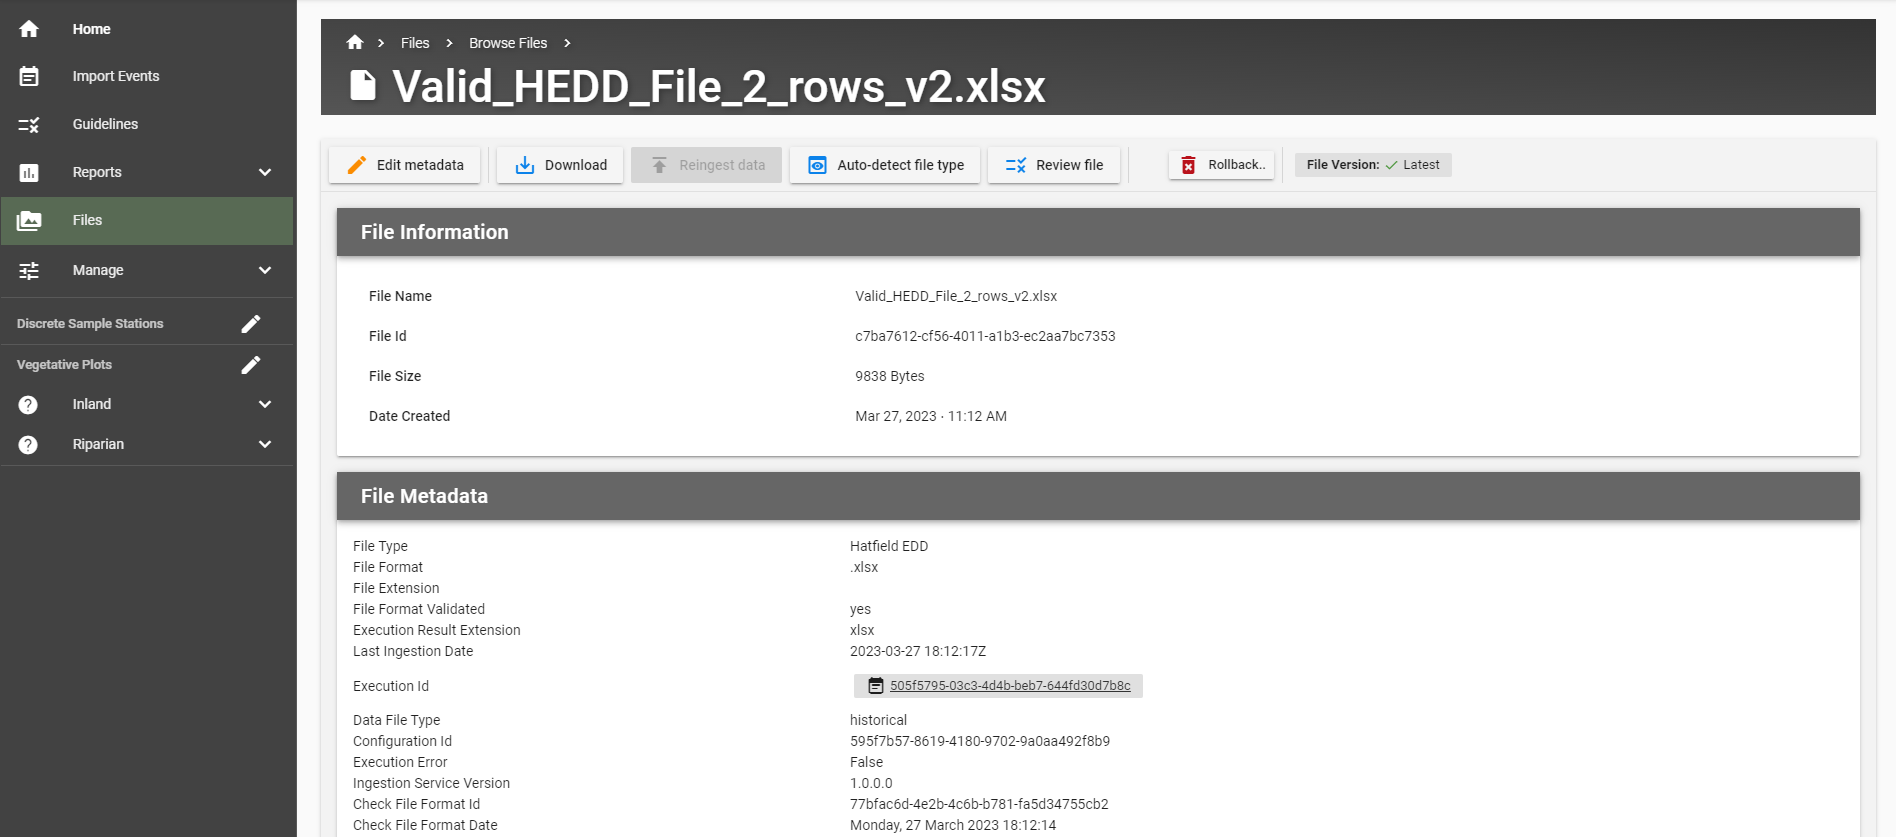
Using Browse Events#
Navigate to the “Files” page from the sidebar on the left
Click into “Browse All Files”
Filter for the file you want to view the versions of using the search bar or use the filer options on the left
Click into the file you want to view the versions of
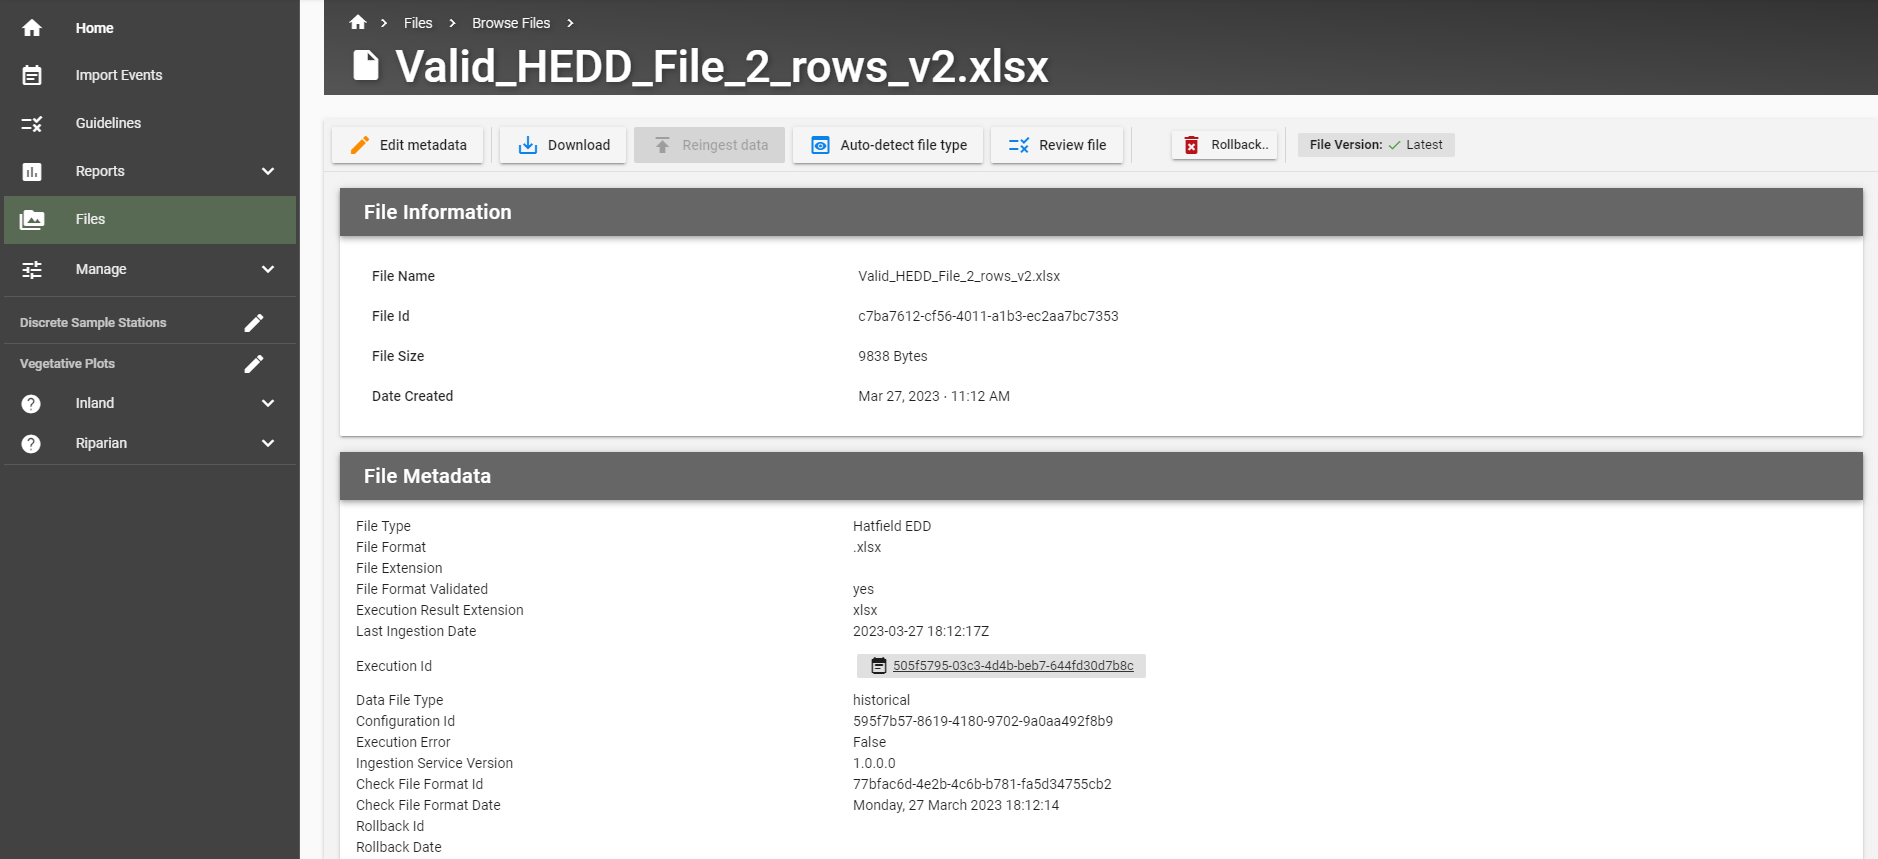
The File Version is shown on the top of the page under the file name
Managing File Schemas#
File schemas define the metadata fields that can be associated with a file. Users can add new fields to a file schema or delete fields from a file schema. This functionality allows users to standardize the metadata fields that are associated with their files.
Navigation to File Schemas page#
To navigate to the “Files Schemas” page, open the “Manage” dropdown
Scroll down to “Other” and click on “File Schemas”
There you will find a table of file schemas
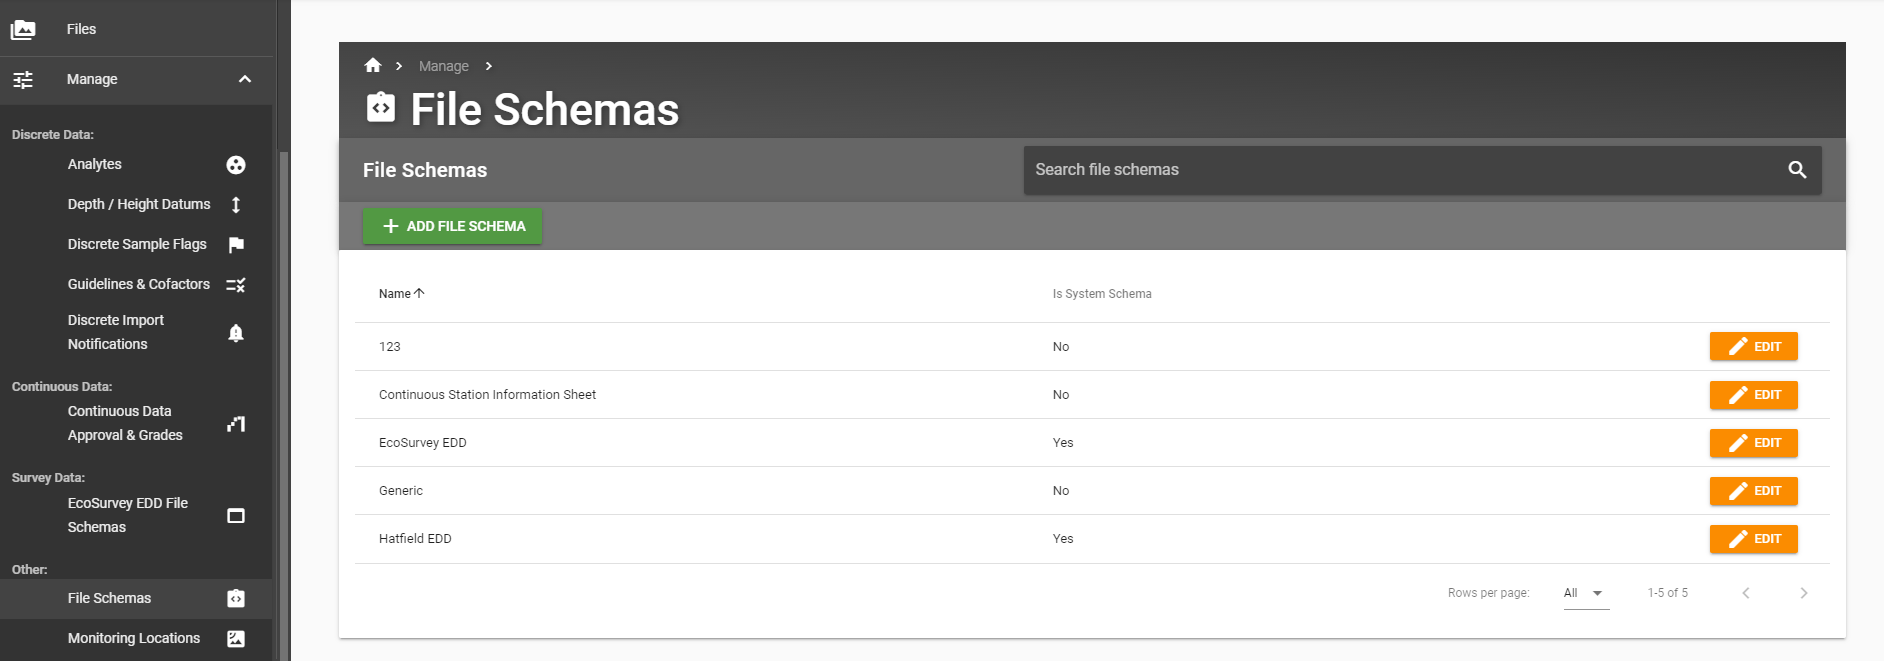
Edit File Schemas#
Step 1#
You can add or delete field names in each file schema by clicking the edit button next to each file schema
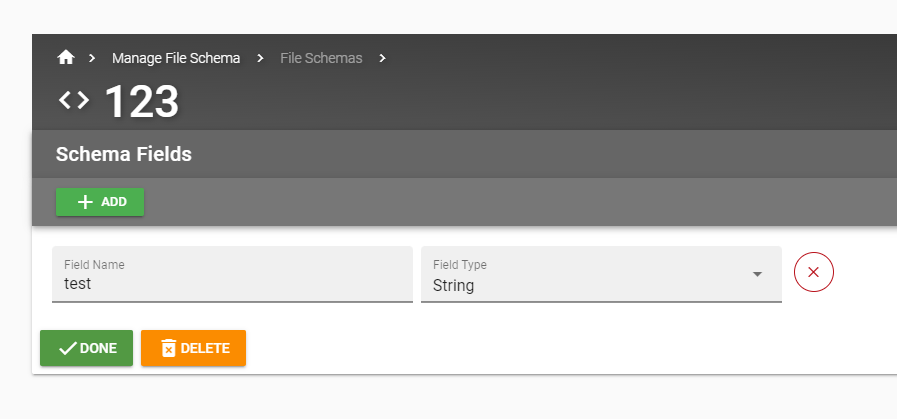
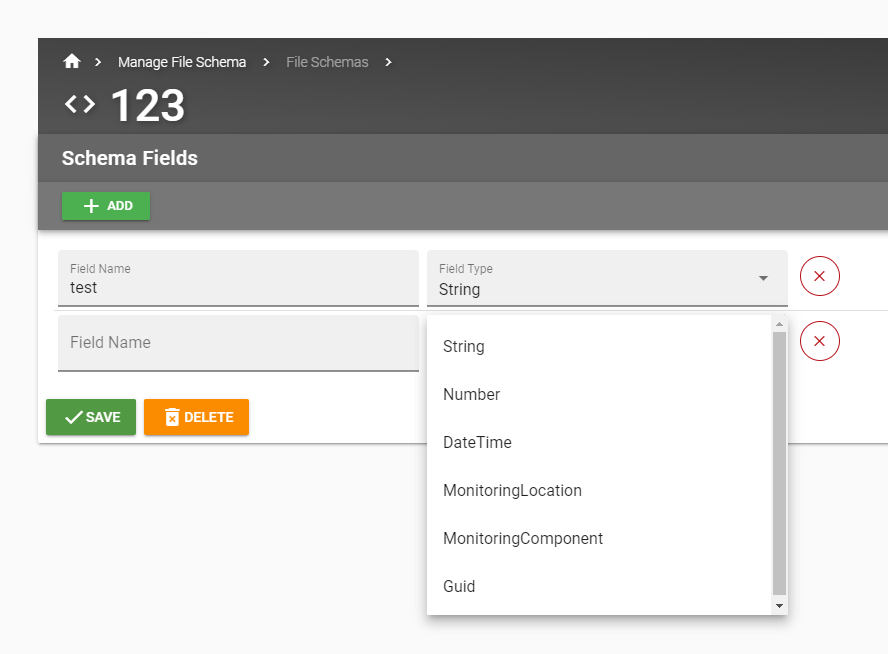
Step 2#
When adding another field, click “+ Add” and enter in the name and type of the new field and then click “Save”
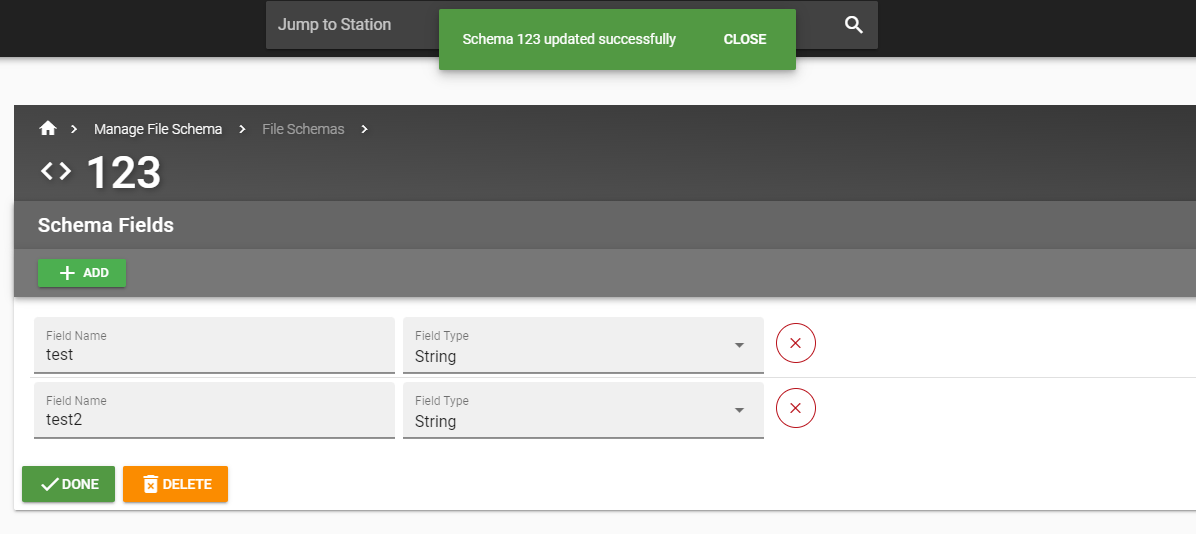
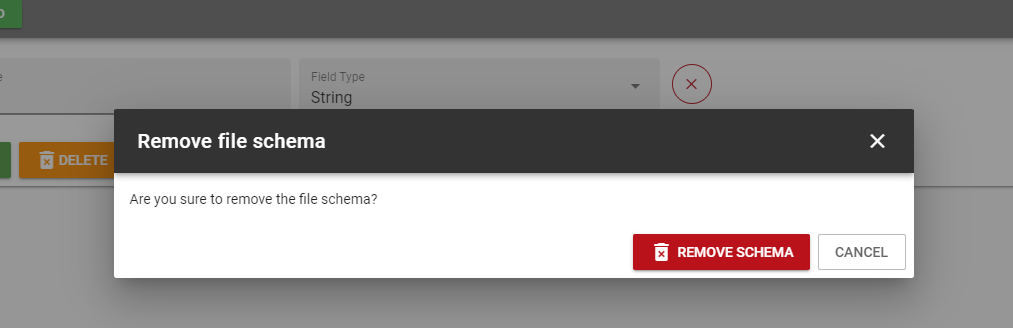
Step 3: remove schema field#
To remove a schema field simply click on the red x circle next to the field you want to delete
Click “SAVE”
Step 4: Remove File Schema#
To remove the entire file schema, click the orange delete button underneath the list of schemna fields
Click “REMOVE SCHEMA” to confirm your choice
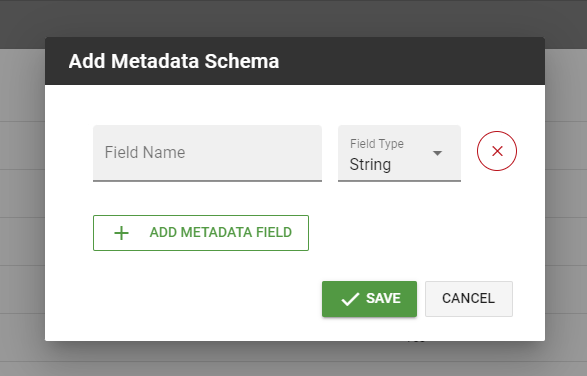
Add a New File Schema#
Step 1#
Click on “+ ADD FILE SCHEMA”
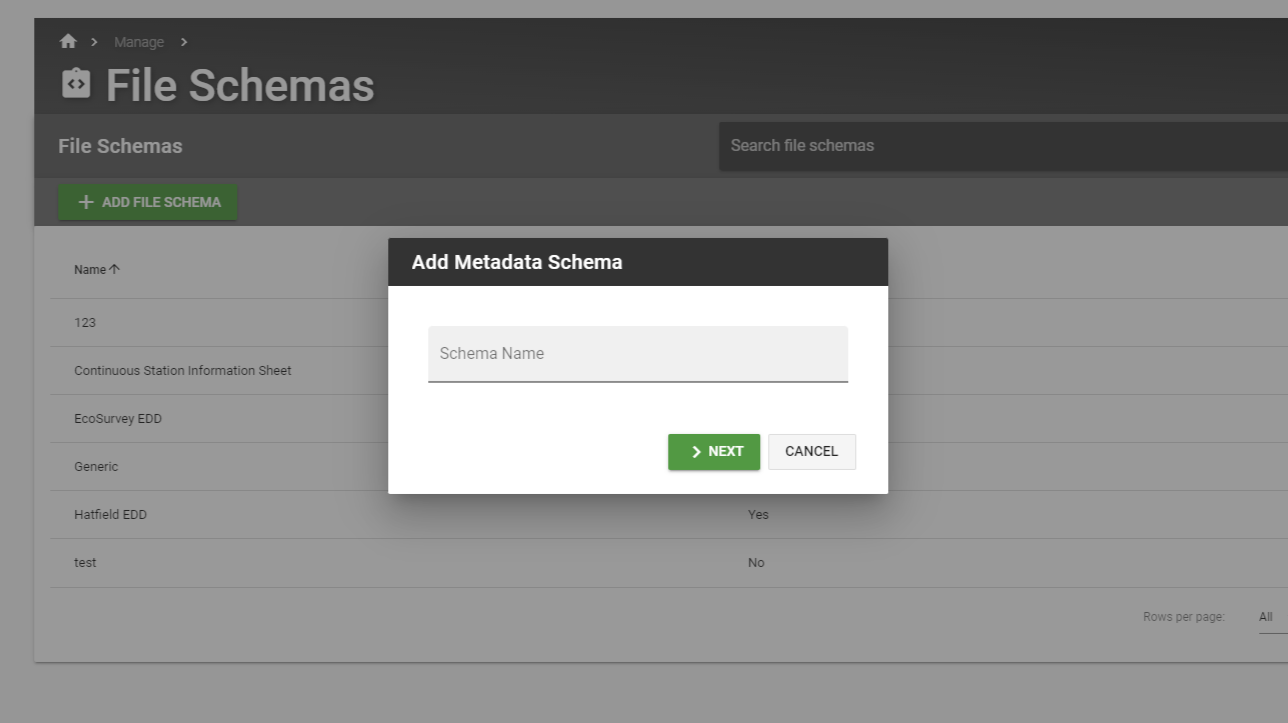
Step 2#
Enter as many metadata fields as you need by filing in the Field Name and Field Type and then click “SAVE”
Changing the Schema of a File#
It is quick and simple to change the schema of a file that is already uploaded to EnviroData. When you change the schema of a file, all the string field values in the file will be removed.
Step 1: Navigate to the “Files” page#
Step 2: Click on “Browse All Files”#
Step 3: Click on the file you want to change the schema of#
Step 4: Click on “Edit Metadata”#
Step 5: Click on “File Type”#
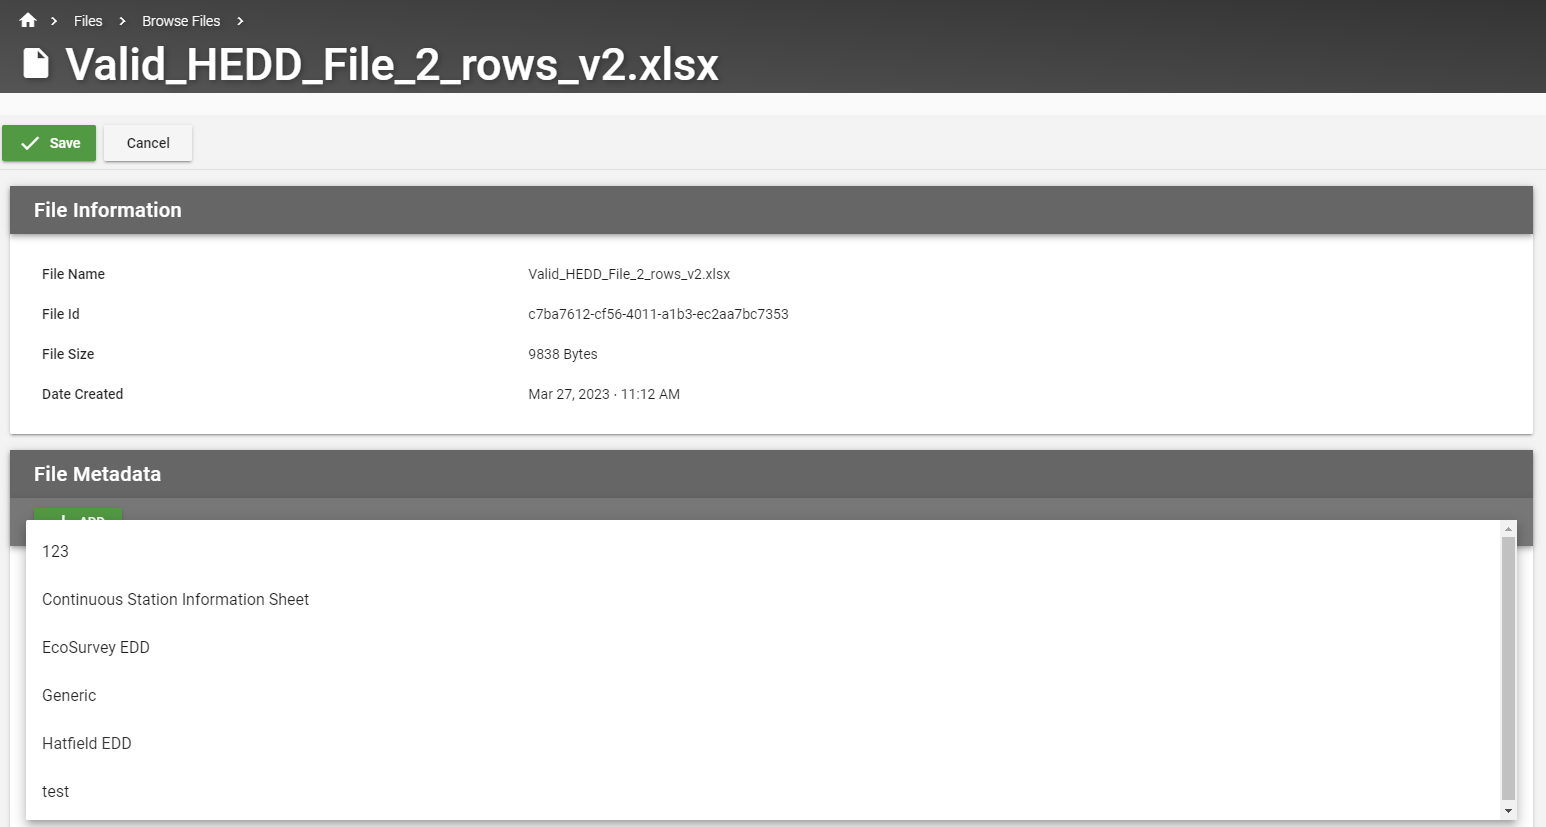
Step 6: Click on the file type you want to change it to#
Note: changing the schema of the file will remove all the string field values which you will have to fill in manually before saving the changes to the file.
Step 7: Click on “Save” at the top of the page#
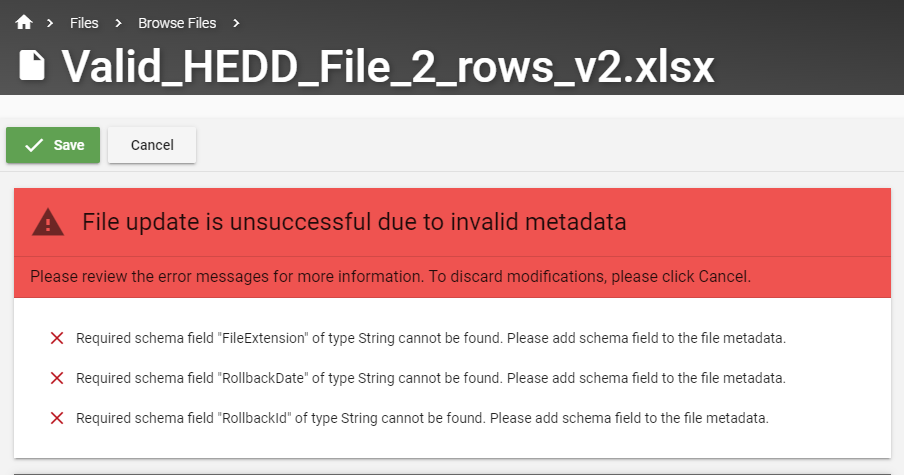
If the update is sucessful you will see a this message at the top of the page

If the update is has errors you will see a this message at the top of the page
Simply find the errors as shown by the error message and fix them before clicking “Save” again