Analytes and Guidelines#
Introduction#
In this final tutorial, we’re going to go over how to manage analytes and guidelines in EnviroData. Understanding the tools presented in this tutorial will go a long way to helping you make the most of EnviroData’s powerful and flexible data management capabilities.
Summary: Analytes and Guidelines
The Guidelines page provides a summary of all guidelines accesible to your account.
The Manage > Guidelines and Cofactors page provides detailed summaries and management tools.
The Cofactors tab provides tools for linking analytes as cofactors and creating strategies when data for a given cofactor analyte is unavailable.
Guidelines can be linked to analytes via the Guidelines and Cofactors page or the Analytes page.
The Analytes page provides various tools for managing analytes, including the setting of alias names.
Guidelines#
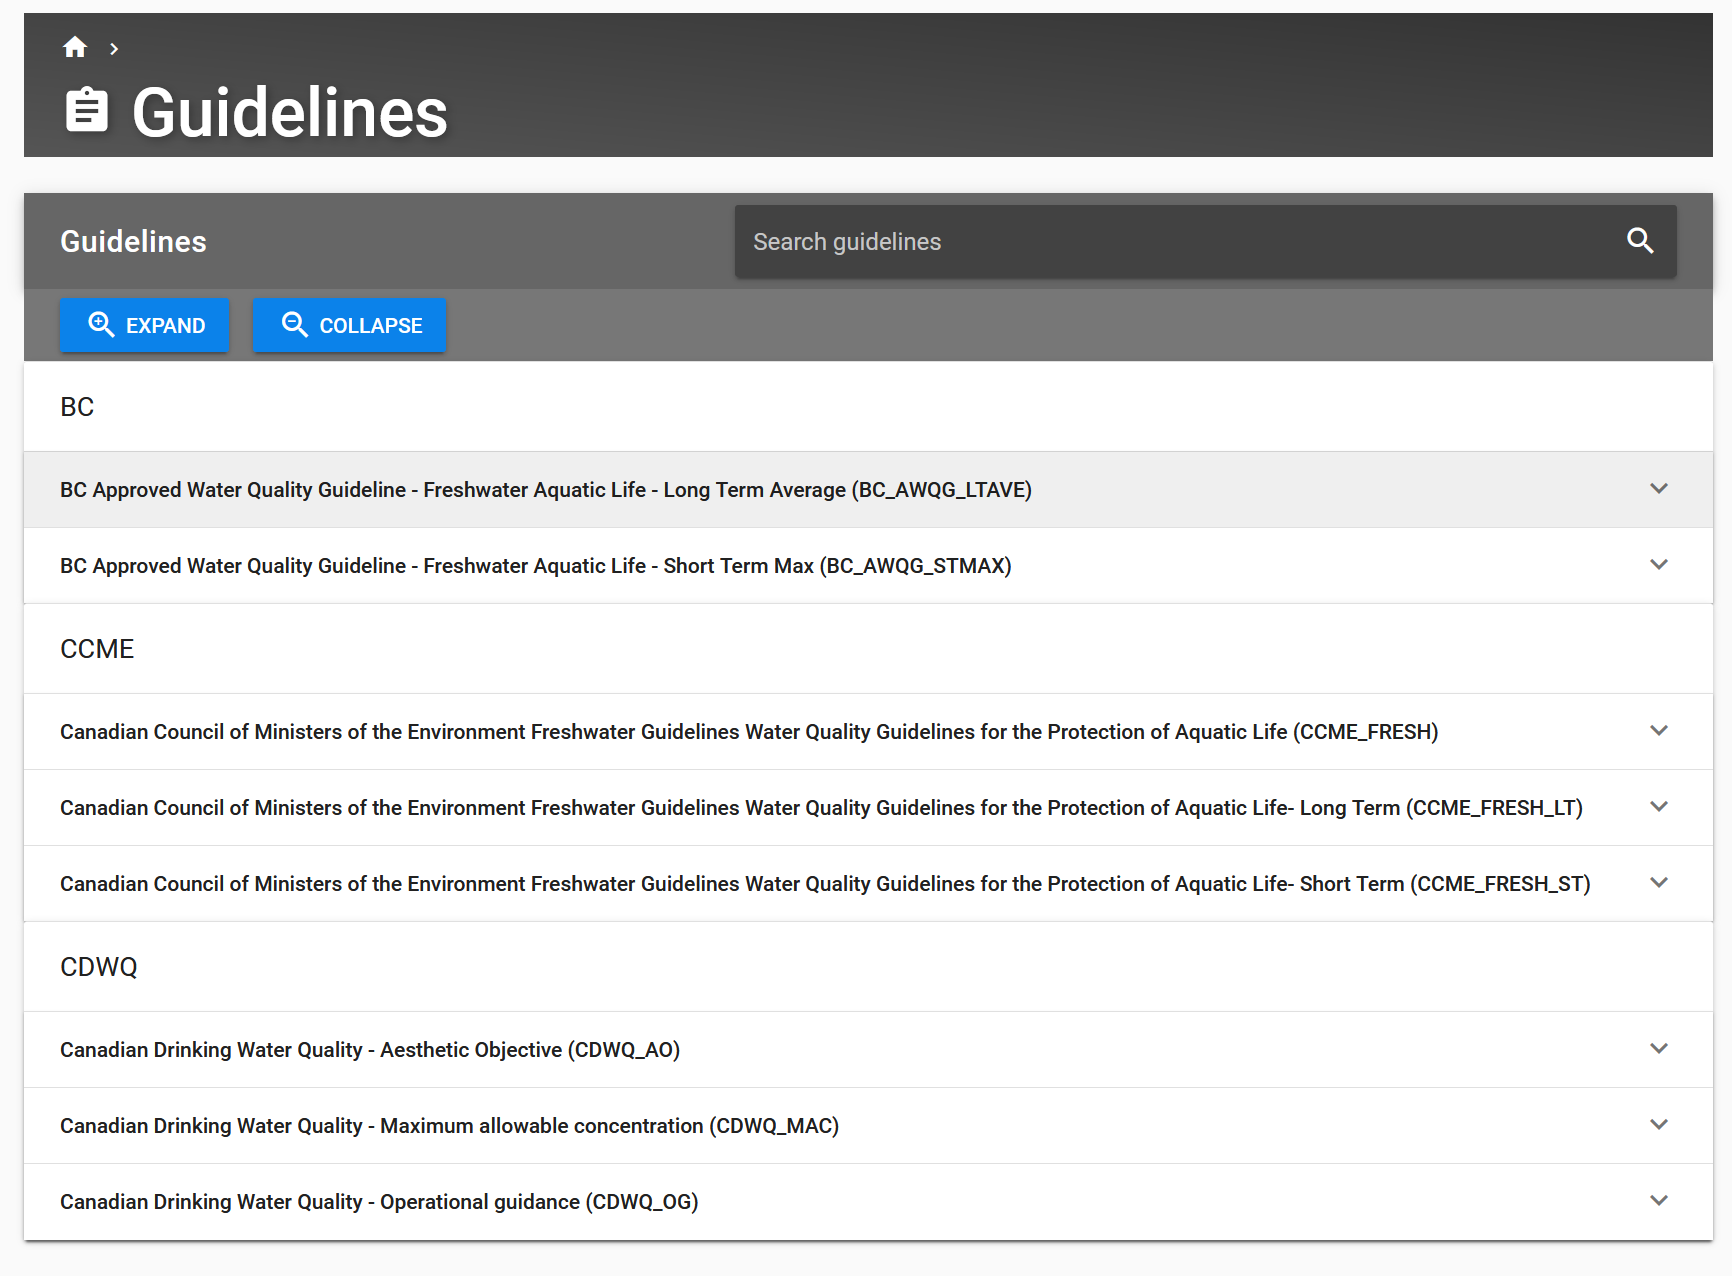
First navigate to the Guidelines page by clicking Guidelines on the left sidepanel. This page gives you an overview of all the different guidelines currently saved to your account.
Click on BC Approved Water Quality Guideline - Freshwater Aquatic Life - Long Term Average (BC_AWQG_LTAVE). The menu will expand giving you a view of all the different guidelines values based on this framework. Specifically, you can see the analyte name, the guideline value (or equation for how it’s calculated if applicable), the units, and a link to the reference.
Tip
If you can’t remember which guideline your analyte of interest is related to, search for it in the search bar.
Managing Guidelines#
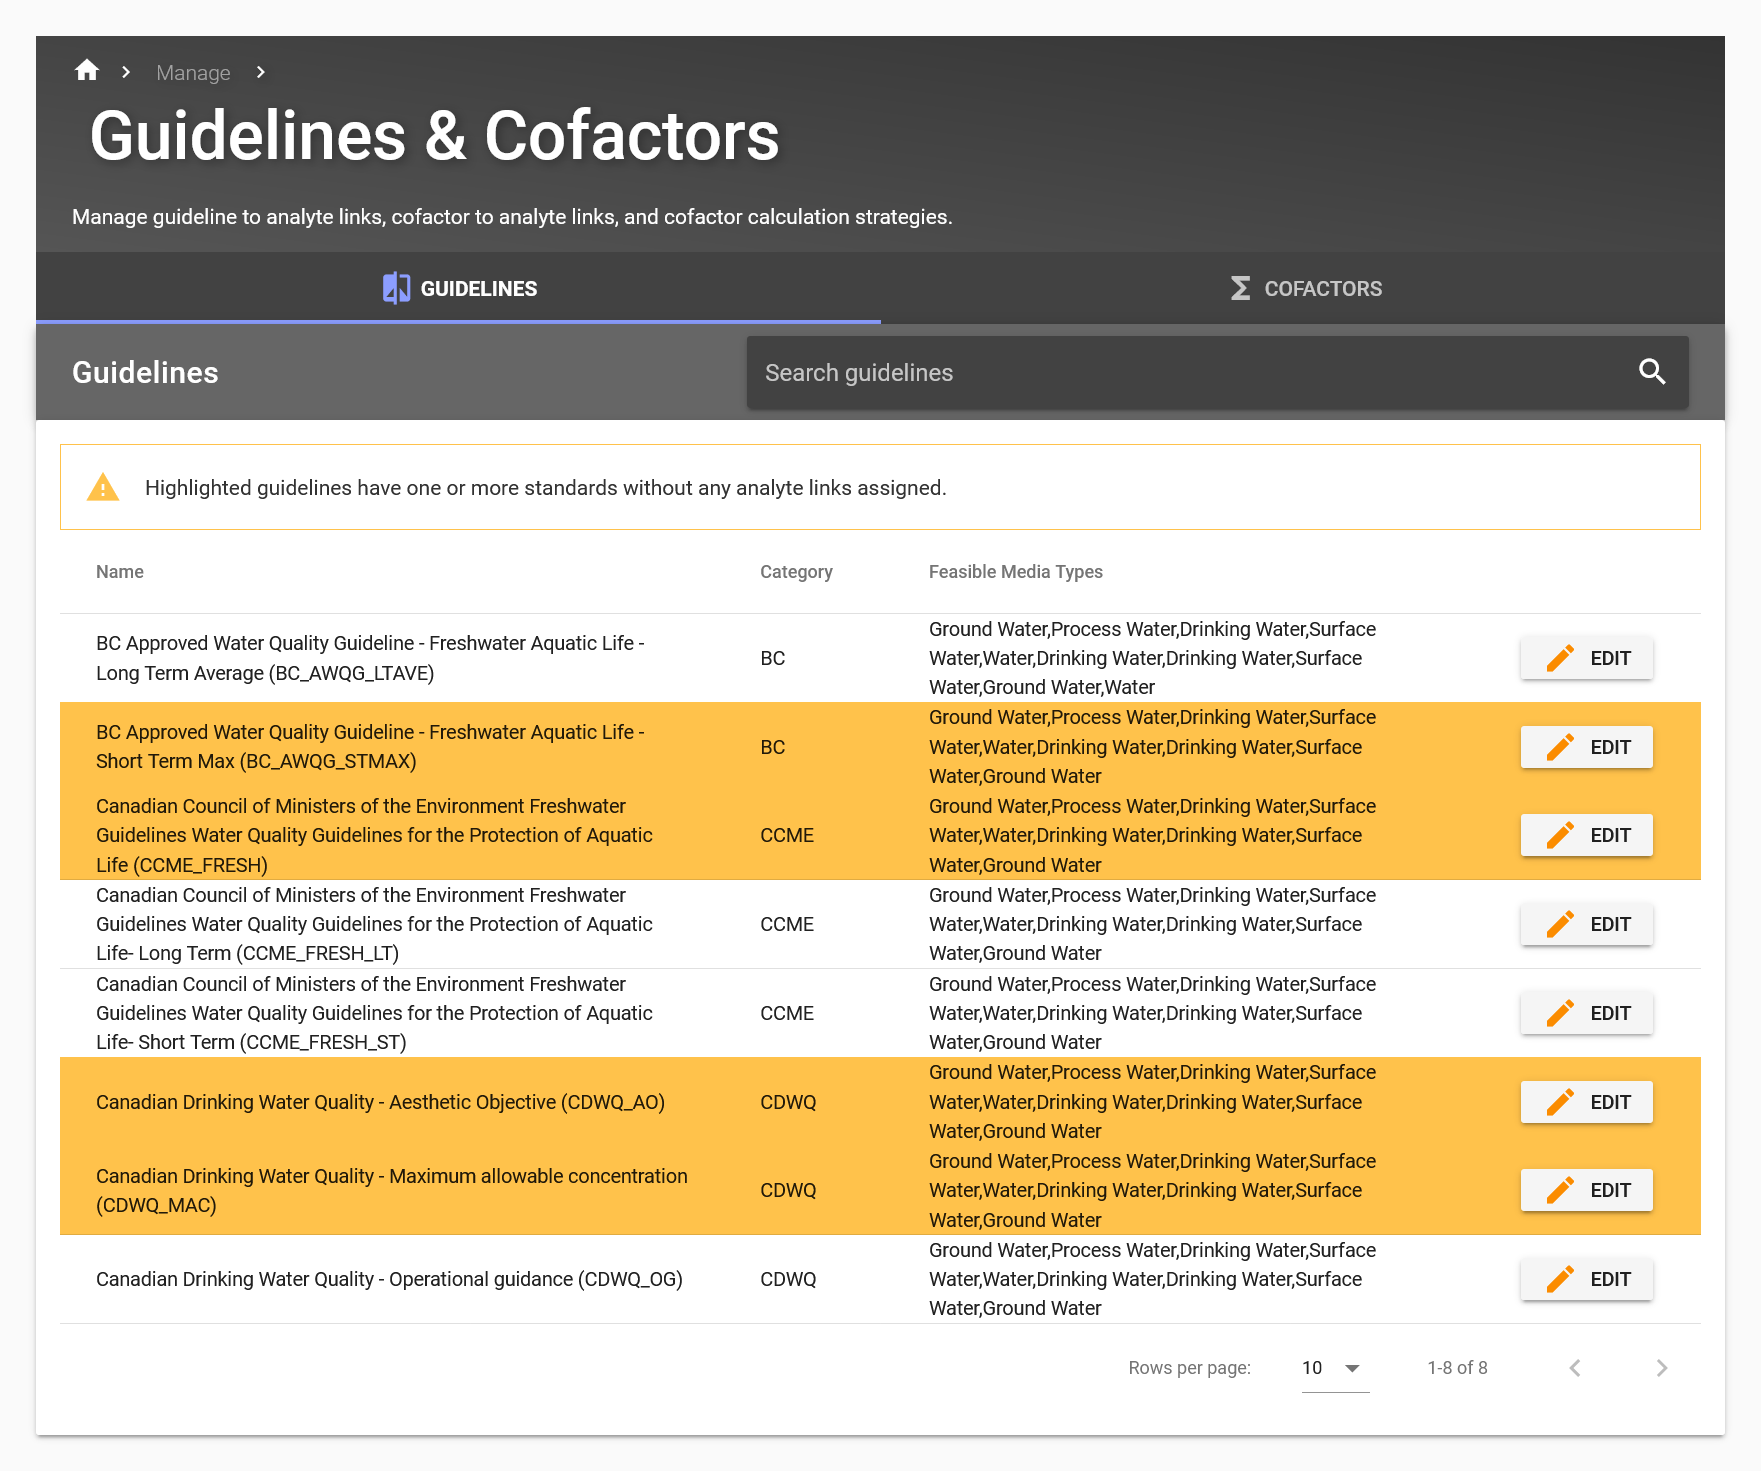
Navigate to the Guidelines and Cofactors page by clicking on the Manage button of the left sidepnal and then selecting Guidelines & Cofactors from the dropdown menu. You’re presented with two tabs on this page: guidelines and cofactors. We’ll come back to cofactors later on and focus on the guidelines tab for now. The Guidelines tab shows a list of each set of guidelines, the category they fall under, and the media types to which they correspond.
You’ll notice that some of these rows are highlighted orange. This means that while the guideline exists in EnviroData, it hasn’t actually been linked to any analyte in your account.
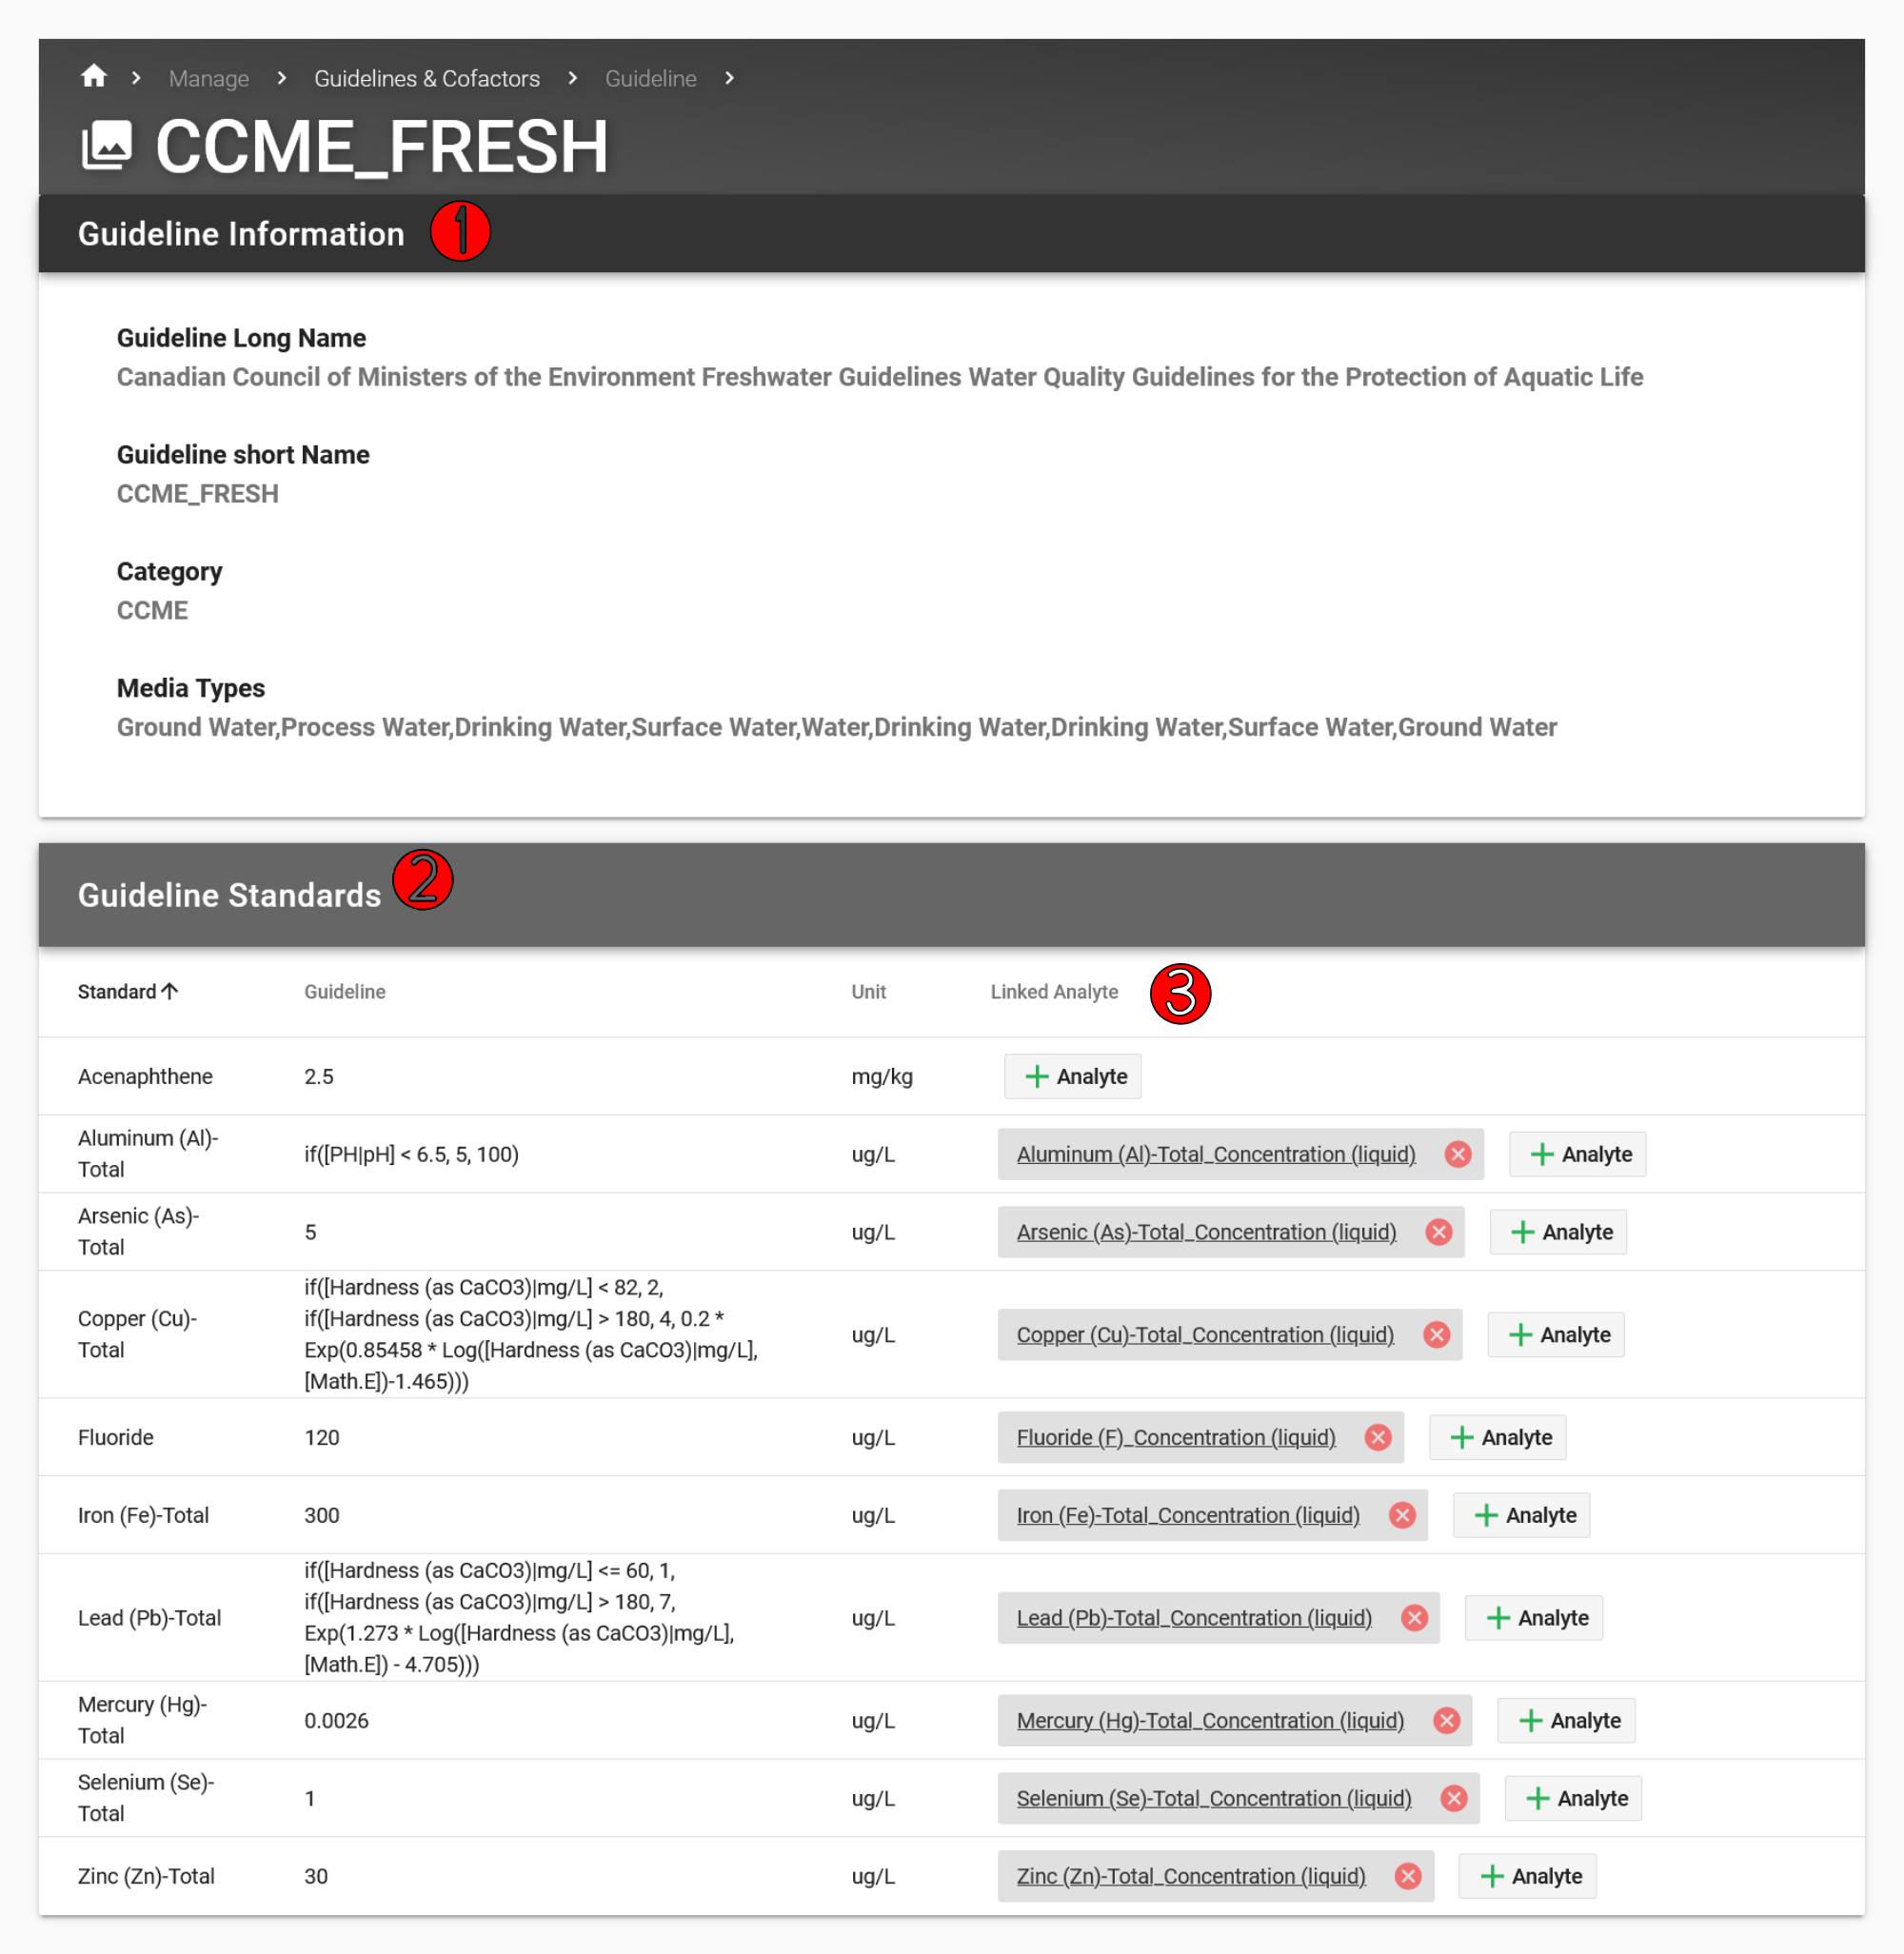
Click on the EDIT button on the CCME_FRESH guideline. The resulting page gives you some general information for this guideline (1), as well as a list of all guideline standards for this guideline (2) (similar to what you saw on the Guidelines Overview page). This page also includes a Linked Analyte column (3), which serves to connect this guideline standard to a specific analyte throughout EnviroData.
When data for a new analyte is saved to the database during an import event, EnviroData automatically creates a new analyte. You can prove this to yourself by looking at the new analytes detected during the import of the following file: C1823674R-R2021-10-19_A125_DEMO.xlsx
To do this, browse back to the Imports page, click the View Details button of the relevant import event and look at the Analytes card in the middle of the page. You’ll see that acenaphthene is listed.
Tip
Use the search bar on the Imports page to find import events based on their source file name.
While EnviroData automatically created the acenaphthene analyte for us, you’ll still need to link it to the the correct guideline. Navigate back to the CCME_Fresh Guidelines page and look at the Guideline Standard row for acenaphthene. You’ll see that this guideline standard is not linked with the newly created acenaphthene analyte. This means if you were to try to graph acenaphthene and its guidelines on a monitoring location summary page, you wouldn’t see anything for the guideline.
We could create the linkage right now by clicking the + Analyte button in the Linked Analyte column. But not so fast! We’ll actually show a different way to do this, as it allows us to see another important management page in EnviroData.
Analytes#
Navigate to Manage > Analytes and search for acenaphthene. You’ll see a few results. Click the View button on the row with that has Acenaphthene_Concentration (solid) listed under the EnviroData Analyte Name column. This will bring you to the overview page for the acenaphthene analyte. From here, you have the ability to edit analyte details, aliases, and linked guidelines.
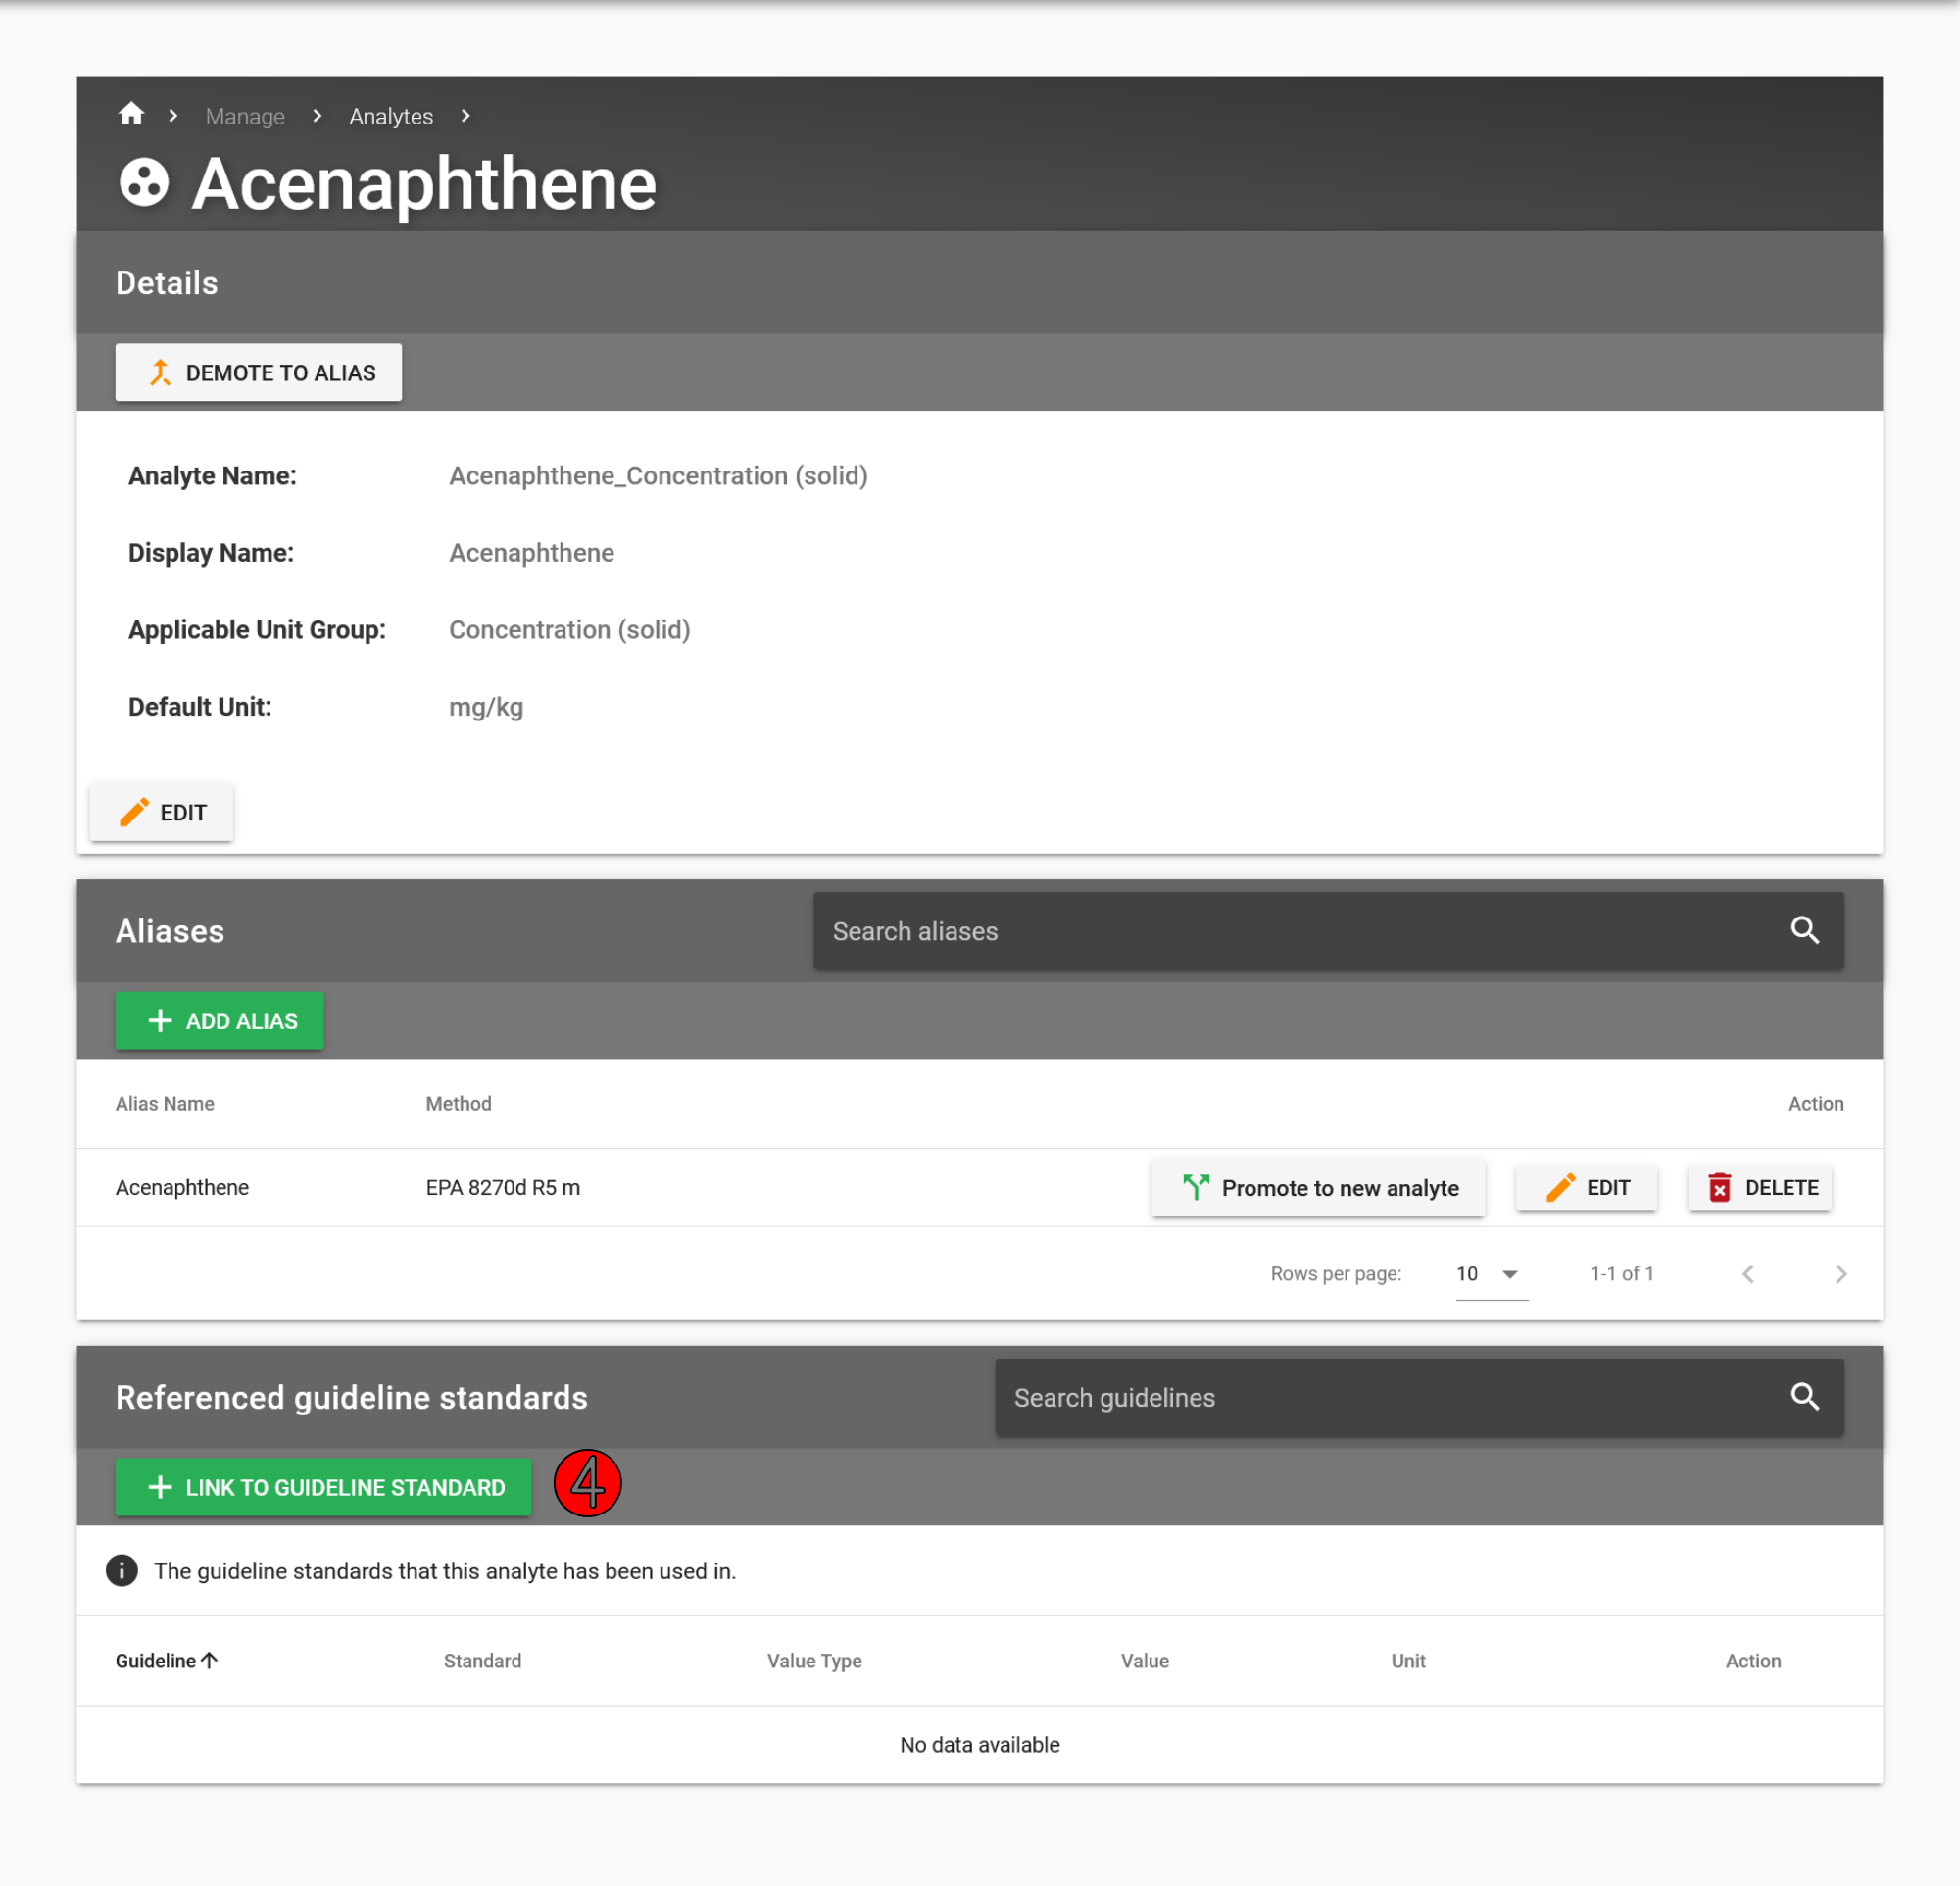
Link this analyte to the corresponding guideline by first clicking the green LINK TO GUIDELINE STANDARD on the Referenced guideline standards card (4). Then select CCME_FRESH and acenaphthene, followed by Save. Navigate back to the* Manage > Guidelines and Cofactors* page to verify that acenaphthene analyte is linked to the correct guideline.
Aliases#
Analytes have aliases, or multiple names that EnviroData recognizes for a given analyte. This is important because there are times when an EDD may be imported with a slightly different name for an analyte than what’s in the database. Such a scenario would cause trouble when EnviroData tries to identify which analyte a given data point belongs to when saving it to the database.
To illustrate this, navigate to the Imports page and search for the EDD C19289185R-R2021-10-19_A125_DEMO.xlsx and then click View Details.
You will see that Acenaphthene (solid) is listed as a new Analyte item. But we know that both solid and liquid acenaphthene already exist as an analyte in our EnviroData database. Rather than creating a second, duplicate acenaphthene analyte from this data point, we want to make it so that EnviroData automatically identifies all data points with this name get saved into our existing acenaphthene (solid) analyte.
To do this, navigate back to the acenaphthene Analyte page by clicking Manage > Analytes and searching acenaphthene.
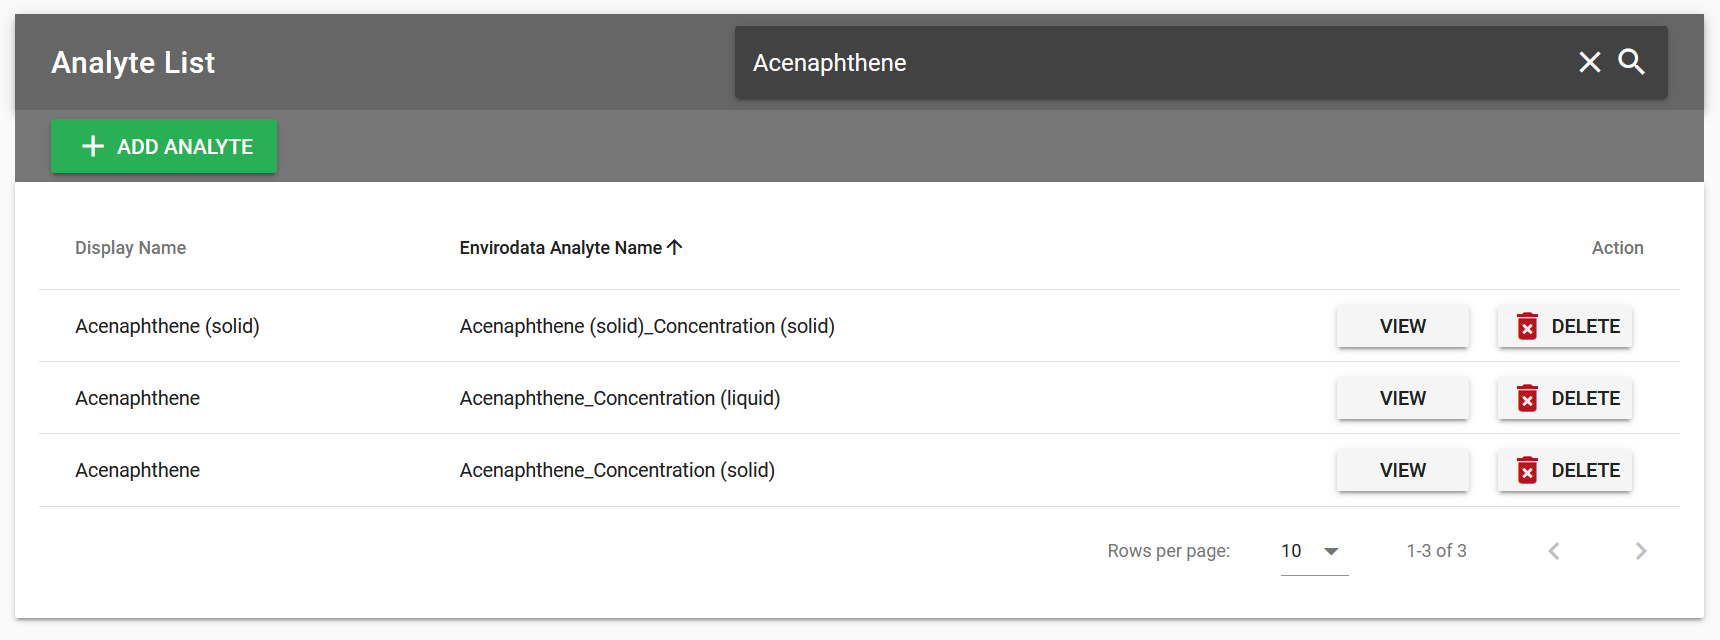
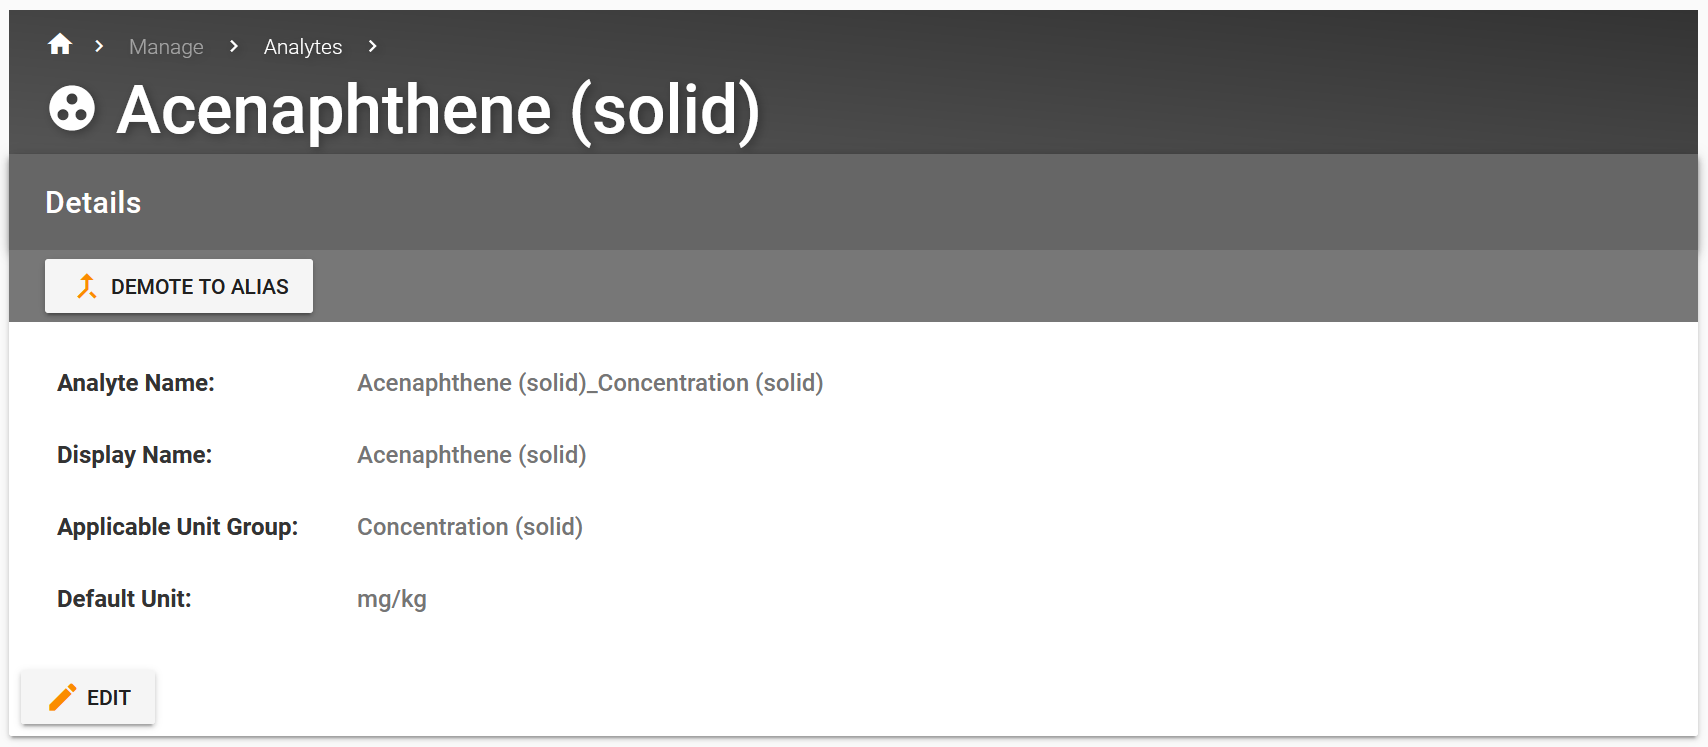
Hit the VIEW button next to our new analyte, which is the one with Envirodata Analyte Name of acenaphthene (solid)_Concentration (solid). Next, set it as an alias of our already existing analyte by clicking DEMOTE TO ALIAS and slecting Acenaphthene_Concentration (solid).
Tip
Aliases are also useful for when more than one analytical method exists for detecting a single analyte.
Cofactors#
A cofactor is any analyte that is used in the calculation of another analyte’s guideline standard. From the cofactors page you can specify which analyte EnviroData should use as a cofactor for a given guideline calculation. You can also specify a cofactor calculation strategy, which tells EnviroData how to calculate a guideline standard in the event that there is no cofactor data available.
Navigate back to the cofactors page by clicking Manage > Guidelines and Cofactors and selecting the cofactors tab.
The first thing you’ll likely notice are the two warning cards at the top.
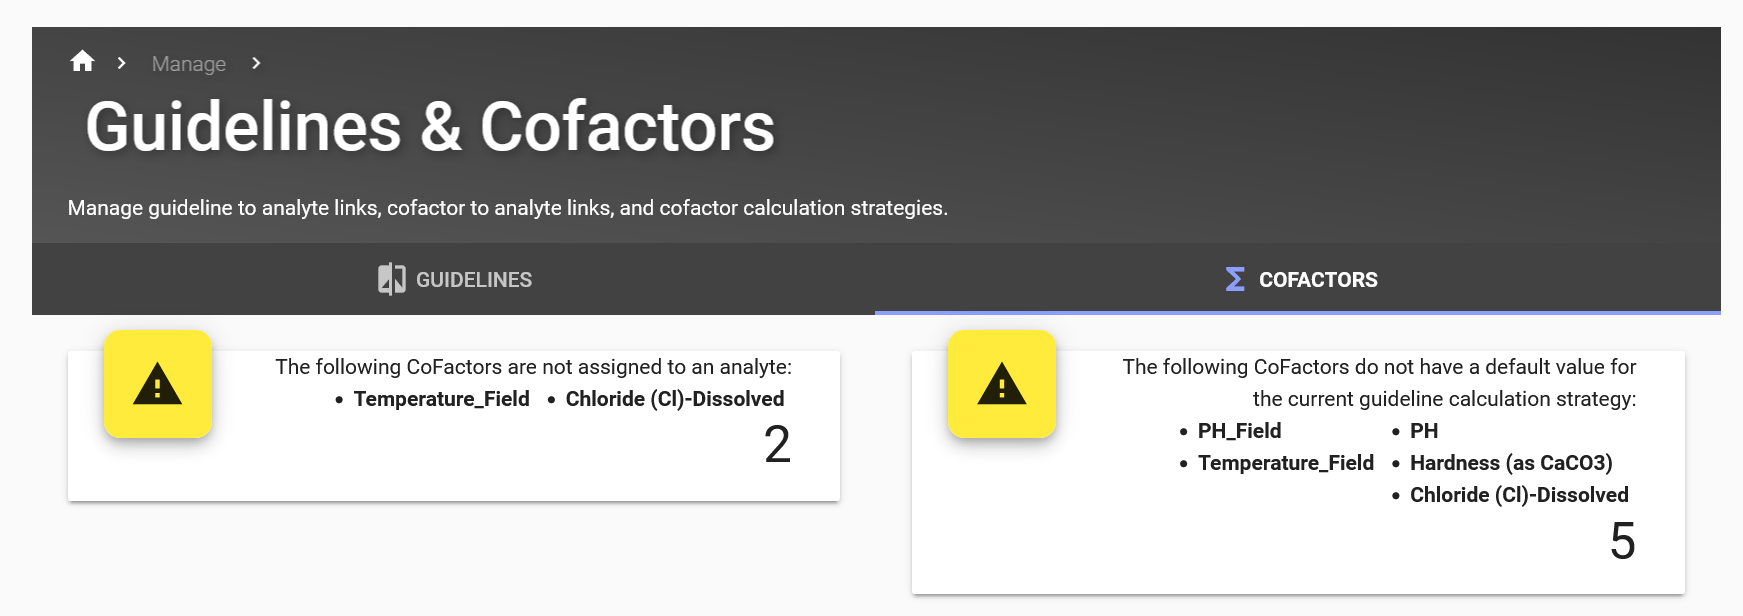
This means that a guideline calculation exists which requires a cofactor yet has no analyte assigned.
The second warning states that we need to tell EnviroData what to do when there is no data for a cofactor available (calculation strategy).
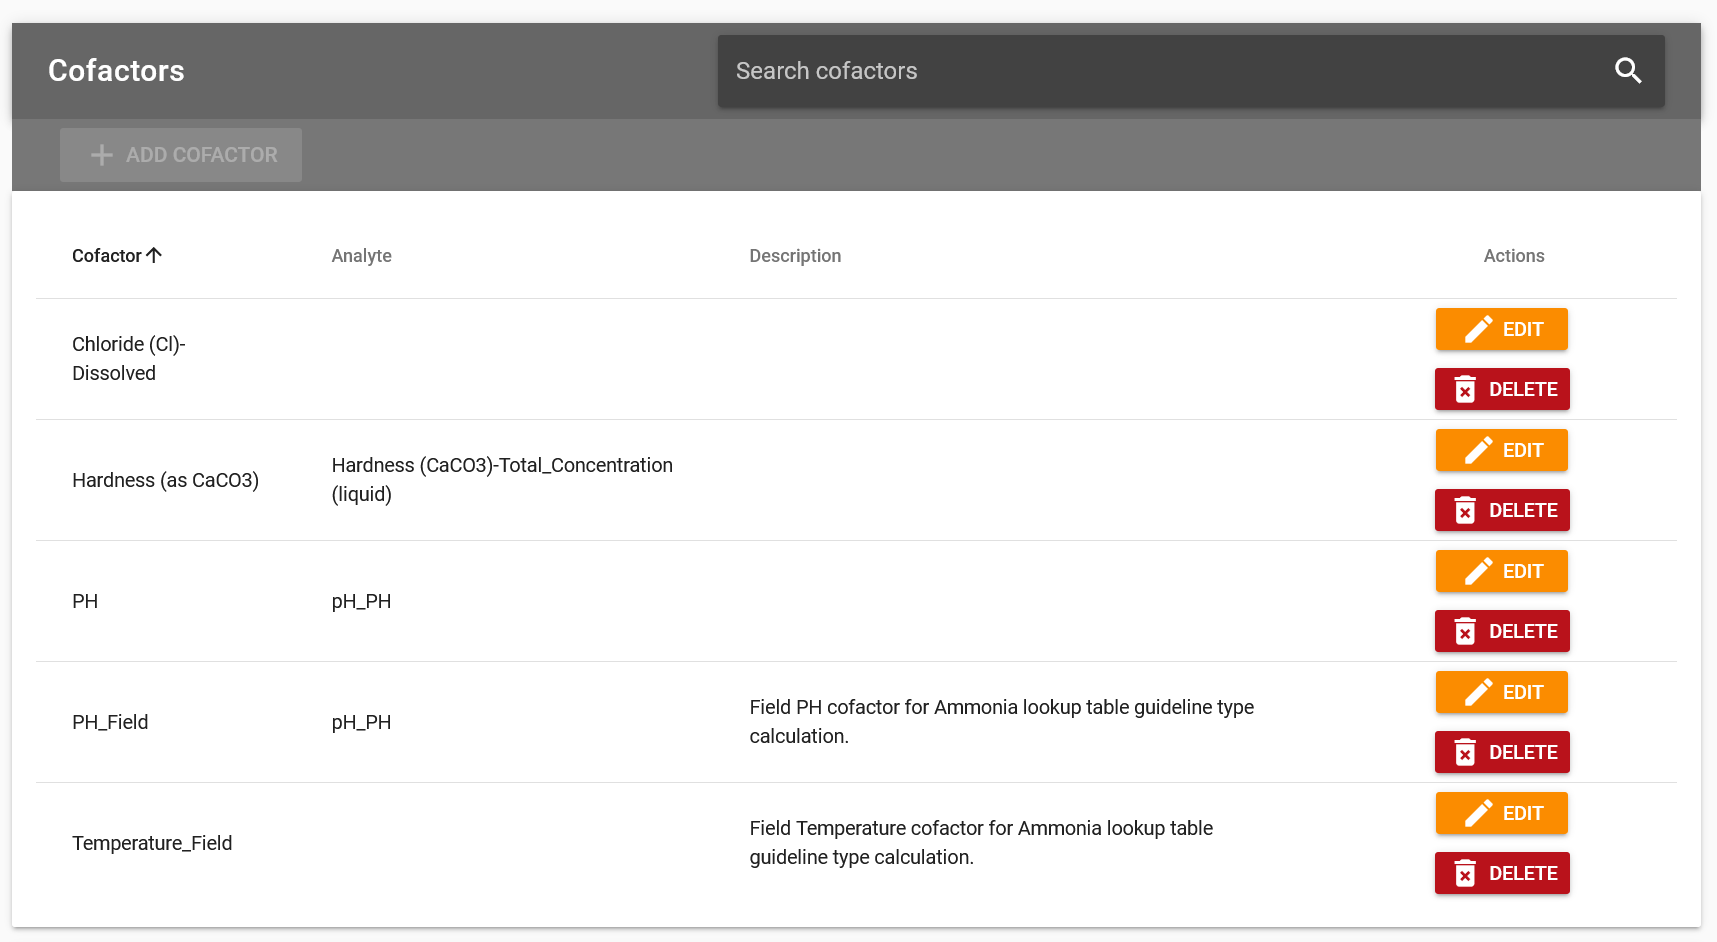
Below these warnings is the Cofactors card, which shows all cofactors that are required based on the guidelines that have been defined in your account. The Analyte column shows which analyte is linked as the cofactor. We will assign one for Chloride. Click EDIT and select “Chloride (Cl)-Dissolved_Concentration (liquid) from the dropdown menu. Then hit SAVE.
Next, we’ll set a guideline calculation strategy which will determine how a guideline is calculated if there’s no associated cofactor data. Click EDIT in the Cofactor Calculation Strategy card.

The options are as follows:
Use a single unchanging value for each cofactor
Sets a default value. Calculations of guidelines will always use this value and will ignore other values such as from station data.
No default value for cofactor
If a guideline needs to be calculated from a cofactor, it will simply be skipped.
Calculate values from same sample
If available, use the value from station data to calculate a guideline; otherwise use default value. If no default value, then skip.
Choose “Calculate values from same sample (with default values)”. After you’ve done that, click NEXT. You will see a warning that cofactors without default values were found, and that you’ll have to set them yourself. That’s okay. Click Next.
Here, you can either set a default for each cofactor or leave them blank. Once finished, hit SAVE.
Conclusion#
That does it for the EnviroData tutorials! You should now have a strong understanding of how to manage data, monitoring stations, analytes, guidelines, and reports using EnviroData. There’s still plenty more to explore. Check out the EnviroData Cookbook for recipes of common tasks or the Information Page for more on some important concepts related to EnviroData.